
Disclosure: When you click on links to various merchants on this site and make a purchase, this can result in this site earning a commission. Affiliate programs and affiliations include, but are not limited to, the eBay Partner Network
Here’s 15 things to organise before you travel to Japan.
While some of these may not be relevant depending on your plans, these are things we needed to do based on our itinerary
(there’s also a couple of places in here that we didn’t visit but thought it’d be good to include on this list to make it a bit more complete)
Most importantly:
We’ve put this list in the order that things need to be done before you travel to Japan.
Let’s get started:
As Soon As You’ve Planned To Travel To Japan
1. Open a Wise Travel Money Card account (and order a physical card too)
One of the first things we’d recommend you do once you’ve decided to travel to Japan is to open a Wise Travel Money Card account.
The main reason is because it allowed us to upload AUD then jump on an opportunity to buy some Japanese Yen when the exchange rates were good.

Then, with the app you can “Add to Apple Wallet” to use your phone to Tap-to-Pay
(I’d also highly recommend ordering a physical card too because not all places in Japan accept Apple Wallet but are fine with Tap-to-Pay using physical cards)
4-months out
2. Book your rooms at the Tokyo Disney Resort Hotel
We loved our stay at the Toy Story Hotel!
If you’re planning to stay here you must remember that it sells out in a matter of minutes or a few hours…

…so put this in your diary and set an alarm:
Reservations open at 11:00 am (JST) exactly 4 months before the date you plan to stay
(if there’s no equivalent date, then you can make a reservation from 11:00 am on the 1st of the following month)
3-months out
3. Enter the draw to be able to buy tickets to the Nintendo Museum
If your Kyoto itinerary includes visiting the Nintendo Museum, then you’ll need elements of both luck and good planning:
You have to enter a random ballot to win the right to be able to buy tickets!
So after you’ve set up a free Nintendo account, you can apply for the ticket drawing here 3 months prior to your visit
(you only pay for your ticket if your entry is drawn)
2-months out
4. Purchase your Disneyland and/or DisneySea tickets
Planning on going to Disneyland or Disney Sea?
It’s unlikely that it’ll sell out BUT it does happen… so why risk it!
If either of the Disney parks are on your list of things to do, then pop it in your diary to buy tickets from 2:00 pm (JST) for admissions the same date 2 months later
(like Tokyo Disneyland Hotel, if there’s no equivalent date, then you can make a reservation from 2:00 pm on the 1st of the following month)
Note: The Tokyo Disney Resort App or website won’t allow you use a non-Japanese credit card so you’ll need to buy your tickets here through Klook
(then you scan the QR code on the tickets to upload them into the app)
5. Buy tickets to the Ghibli Museum
This one is super popular for fans of Studio Ghibli movies… and tickets sell out in a matter of minutes.
Tickets for Ghibli Museum become available for purchase at 10:00 am (JST) on the 10th of the month for the subsequent month
(eg, tickets go on sale on 10th May for 1st to 30th of June).
Tickets are sold here through Lawson Entertainment…
…but if you miss out you might still be able to go if you get a tour here through Klook)
31 Days Out
6. Make a reservation for the Pokémon Cafe
Reservations for the Pokémon Cafe open up 31 days in advance at 6:00 pm (JST).
But, while some of the more popular attractions in Japan book out in minutes, the Pokémon Cafe books out in seconds!

So if the Pokemon Cafe is on your list, you need to get in front of your computer around 5:55 pm (JST) and:
- Have a clock next to you that is accurate to the second
- Open up the Pokémon Cafe reservation page
- Go through the ‘Let’s confirm you are human’ process
- Choose your number of guests, and then
- At *precisely* 6:00 pm (JST) hit refresh
- The ‘N/A’ text underneath the date will disappear and the cell will become white
- Click through, and then immediately choose a time
HINT: Even when I was writing this article and taking the screen capture of the calendar a spot became temporarily available for next week!
So if you miss out, keep checking back, you’ll never know your luck.
30 Days Out
7. Book tickets for Shibuya Sky
When we booked our tickets for Shibuya Sky it was super competitive:
The timeslots to enter to see the sunset all sold out in a few minutes… and then all of the tickets for the date we wanted to go were all gone in around 1/2 an hour.
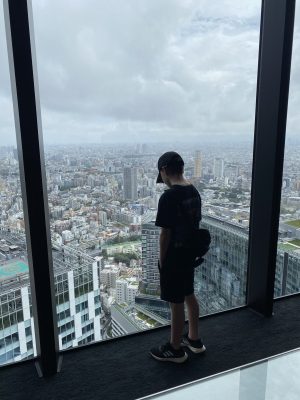
Tickets for Shibuya Sky go on sale at midnight (JST) 30 days before the entrance date
(and you have to now get tickets here from Klook)
When we purchased you had to go through the Shibuya Sky website which is in Japanese… the browser-translation function didn’t work properly so we had to try again the next night!
2-3 Weeks Before You Travel to Japan
8. Get an International Driver’s Permit (IDP)
If you plan on driving when you travel to Japan, then you’ll need a translation of your valid Australian driver’s licence into Japanese (aka an International Driving Permit or IDP).
The reason I’d wait until the month before you travel is because an IDP is valid for 12 months…
…and you only need to allow 3 to 8 working days for it to be processed, printed, and mailed to you
(so you may as well try to get as much of your $51 worth as possible!)
9. Add a Suica IC Card to your Apple Wallet
Suica IC Cards are Japan’s equivalent of our metroCARD, Opal, Go Card, SmartRider, GreenCard, myki, MyWay+, or Tap and Ride card
(but unlike in Australia where there’s a different card for each state, a Suica IC Card can be used all over Japan)
These aren’t just for public transport though:
Not only will you need a Suica IC Card for the subway BUT you’ll find it’ll doubles as a debit card
(some places will accept a Suica IC Card but not your standard credit/debit cards)
The good news is you don’t need a physical card:
To add a Suica IC Card to your iPhone you can just go into your Apple Wallet, tap the “+” symbol, then choose “Transit Card” and search for Suica
(you can then easily add funds to your card straight from your Apple Pay)
10. Buy your tickets to teamLab Planets and/or teamLab Borderless
Whether you choose teamLab Planets or teamLab Borderlless, one thing’s for sure:
They’re both worth it, and they’re both popular.
Does teamLab sell out?
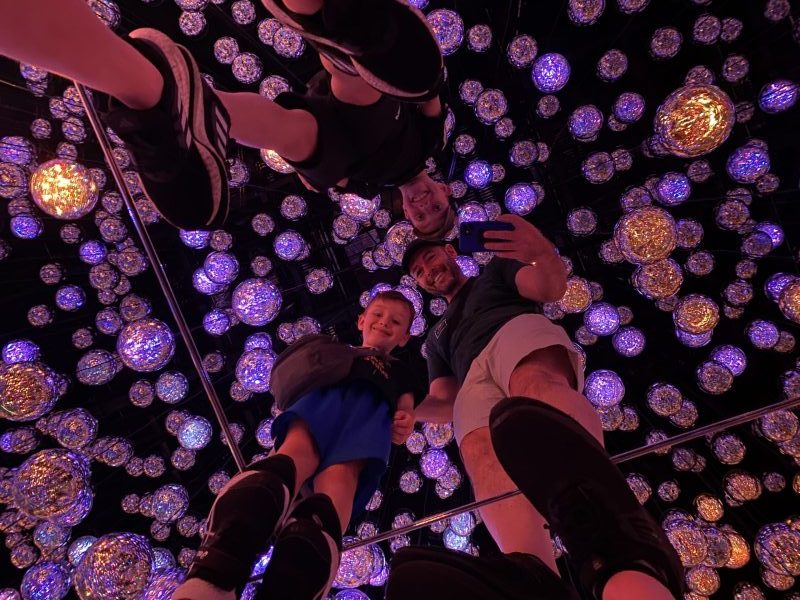
It’s hit and miss… sometimes you can get tickets to either teamLab on the day, sometimes they’re sold out a couple of weeks in advance.
So if either of the teamLabs is on your itinerary I’d get your tickets now here from Klook
(it’s better to be safe than sorry)
11. Hire a pocket Wi-Fi internet device (but choose one that comes with a free eSim)
It’s almost impossible to get around Japan without constant access to the internet…
…and if you’re travelling as a family then hiring a pocket Wi-Fi device is totally worth it
If you hire a pocket Wi-Fi device:
- You organise for it to be delivered to your hotel
- It’s way cheaper than international roaming or data rates
- Your whole family can connect, and
- You return it at the end of your trip by posting it with the provided envelope
But, pocket Wi-Fi has one big downside:
If one of you has to leave the group then you have no internet
(that’s where having an eSIM can be a better option)
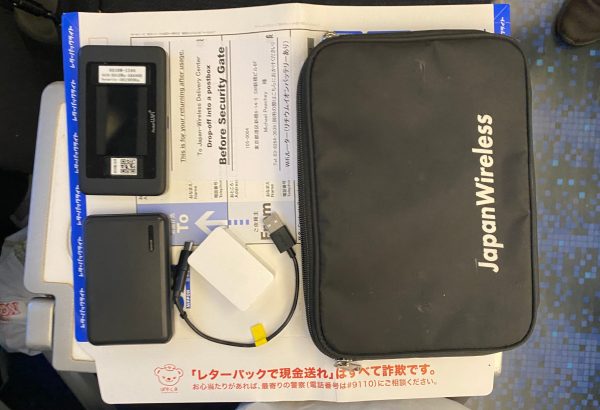
The good news is we hired our pocket Wi-Fi here from Japan Wireless AND it came with a free eSIM too.
This was the best of both worlds.
12. Buy a Japanese wall plug for your phone charger
One thing that surprised us about Japan is the lack of USB outlets:
They’re non-existent in public places (and you hardly see the in hotel rooms either).
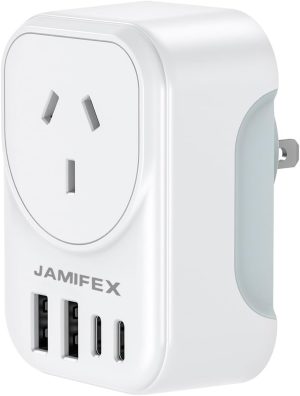
So before you travel to Japan I’d recommend picking up 1 or 2 Japanese USB Wall Chargers here from Amazon
(just enough to get you through the first night or so because they’re cheaper once you get there)
13. Buy some AirTags to track your luggage (and your kids)
Before we left Australia we bought some Apple AirTags for our luggage. These provided some real-time assurance that our luggage was with us on the plane
(we could see when it was getting unloaded and even knew when it was coming down the conveyor belt)
But the best part:
Once we were in Japan we all carried our AirTags in our handbags and bumbags so we knew where each other were
(you can selectively share your AirTag location with specific people)
They’re around $35 when you buy a 4-pack here from Amazon, but we think this was totally worth it
(and we still use them now we’re back in Australia for things like our wallets and keys)
14. Buy an Eki Stamp collection book
Something that all of our kids loved doing was collecting the stamps from all of the different train stations (Eki) that we went through
If this is something that you think your kids might be interested in doing then it’s worth getting an Eki Stamp collection book before you travel to Japan
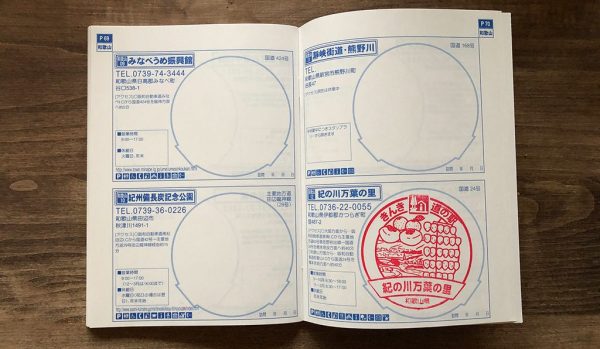
(because they also have Eki Stamps in both Narita and Haneda airports)
You can some really nice ones here from Amazon
15. Buy a travel wallet or bumbag to carry your passports (it’s the law when you travel to Japan!)
Did you know that if you’re visiting Japan as a tourist you must always carry your passport?
The police may stop you at any time and failure to carry your passport or permit is punishable with a fine up to 100,000 yen (around $1,100 AUD)
Not only that:
You can get a refund on the 10% consumption tax (VAT) in places all over Japan for general items and everyday consumables BUT you need to have your passport on you to do this
Now while many people recommend one of these RFID Blocking Neck Travel Wallet, I just used a small bum bag from Amazon
(that way I could carry the Pocket Wi-Fi too)
Summary: 15 things to organise before you travel to Japan
Organising a trip to Japan can be quite confusing because you needed to organise things at different times.
But once you decide WHAT you want to do, this list will help you know WHEN you need to do them.
Comment below:
Anything we’ve missed… or anything that’s changed since we put this together?