
![Fridge Fan Mod Kit Installation: Jayco Swan [Step-By-Step With Pictures]](https://abigpeacheyadventure.com.au/wp-content/uploads/2020/11/Klevakool-Fridge-Fan-Mod-Kit-Jayco-Swan-Camper-Trailer-Installation-Step-By-Step-With-Pictures-1280x640.jpg)
Disclosure: When you click on links to various merchants on this site and make a purchase, this can result in this site earning a commission. Affiliate programs and affiliations include, but are not limited to, the eBay Partner Network
In this article I’ll show you how I installed this caravan fridge fan mod kit in our Jayco Swan.
This modification is to address a common problem in Jayco camper trailers:
Heat can’t escape from behind the fridge which effectively makes it stop cooling.
[on a hot day you can end up with a fridge running at over 10 deg]
Installing a 12V fan helps to remove the trapped heat so the fridge can work more efficiently.
Let’s get started with the first step:
1. Buy a fridge fan mod kit
I’d been putting off installing a caravan fridge fan mod kit
(even though it ranks 3rd on this list of 35 Most Popular Jayco Camper Trailer Modifications)
I started reading up about how to do it and what parts are needed…
…but then I found this review on Facebook:

[now that I’ve installed mine I 100% agree with this]
So I ordered one from 3DprintCQ, and wasn’t disappointed:
What’s included with the Klevakool Caravan Fridge Fan Mod Kit?
What I really liked about buying this kit:
The Klevacool Caravan Fridge Fan Mod Kit comes with absolutely everything that you need to install it

Cable ties. Connectors. Everything.
2. Tools used for the caravan fridge fan mod kit installation
This is everything I needed:
- Small flat blade screwdriver
- Wire strippers
- Cordless drill
- Scissors
- Pliers
Doesn’t look like a lot when it’s in a list… but it sure looked like a lot when I had it everywhere!
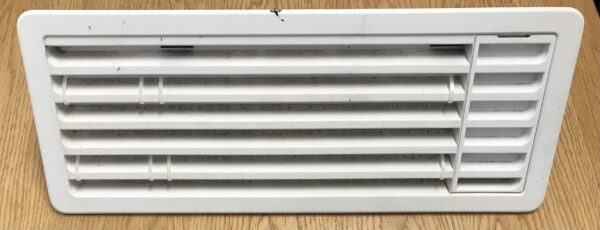
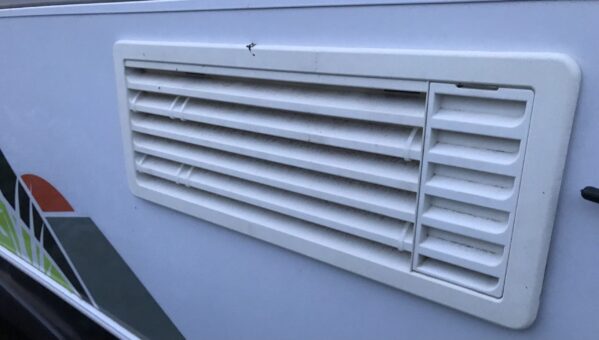
3. Remove the top vent cover from the side of the van
The fan kit gets installed in the TOP vent:
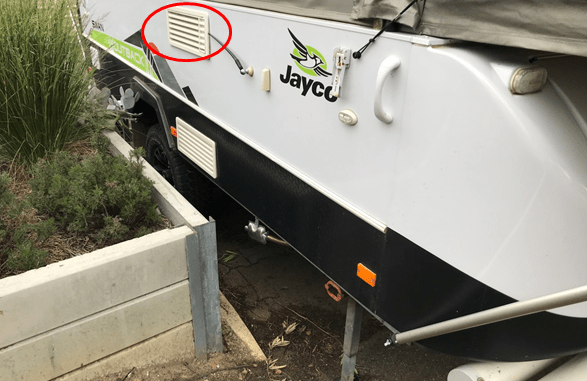
[this pulls out the hot air that’s risen to the top and draws cooler air up and over the fridge’s cooling fins]
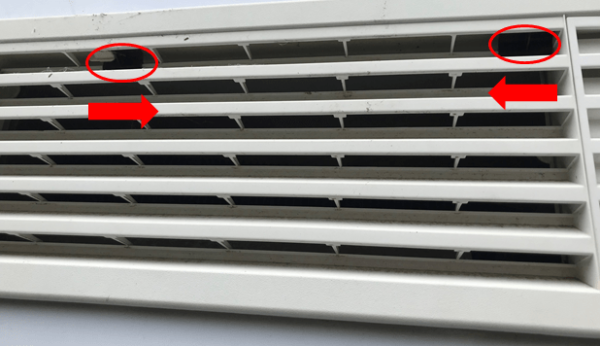
To remove the vent cover it was a case of simply sliding over these little black locking slider clips:
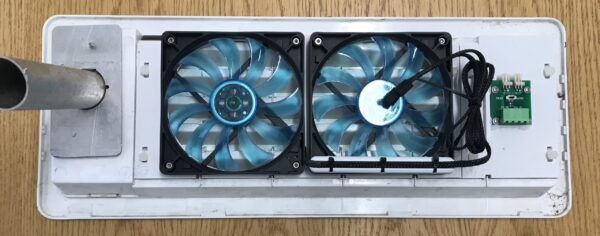
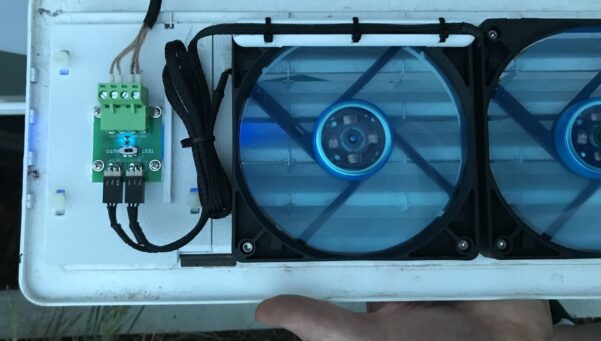
4. Attach the fan casing to the back of the vent cover
Note the ridges, recesses, and bumps on the vent cover…
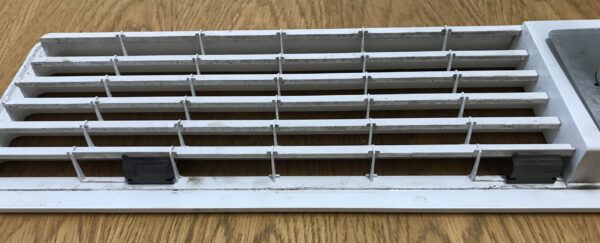
… good thing the casing of the Klevakool Caravan Fridge Fan Mod Kit is made to fit:
Something I really liked about buying from this supplier was they double-checked to make sure it’d be a perfect fit.
I got mine through their eBay store… and this was the messages I received very quickly:

[that’s pretty awesome customer service]

To fix the casing to the vent cover there was two options for how to do it:
- Silicon it, or
- Use the (supplied) cable ties
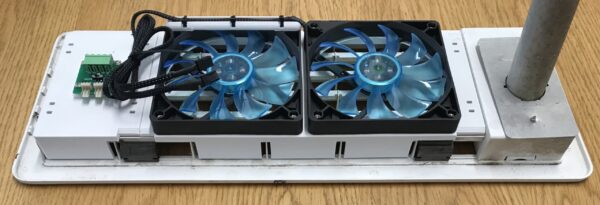
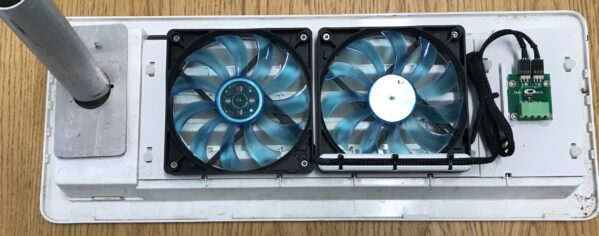
I took the easy option and attached mine using the cable ties:
(I figured that if it looked makeshift I could remove them and silicon it later)
But… here’s how it looked:
Happy with that. No silicon required.
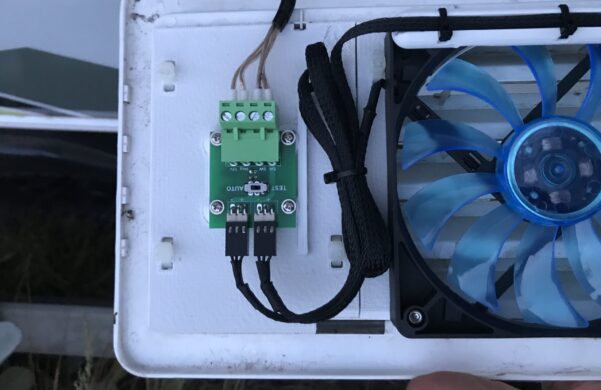
5. Plug the fans into the PCB controller
This was pretty simple:
You can only plug them in one way
(then it was just a case of using a few more cable ties to neaten it up)
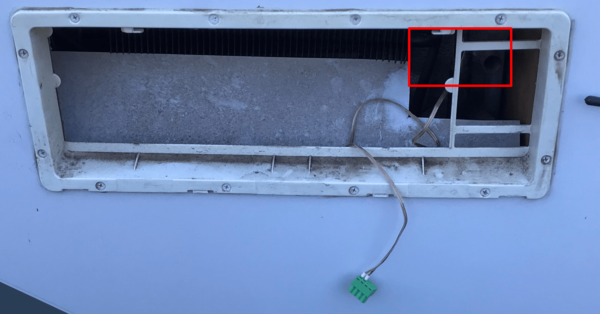
6. Attach the heat activated thermo switch to the fridge pipes
This is where I thought things got pretty cool (pardon the pun):
The Klevakool Caravan Fridge Fan Mod Kit has a heat activated thermo switch and PCB controller to turn the fans on and off.
Sounds technical…but all I had to worry about was securing the sensor switch with cable ties:
And a close-up:
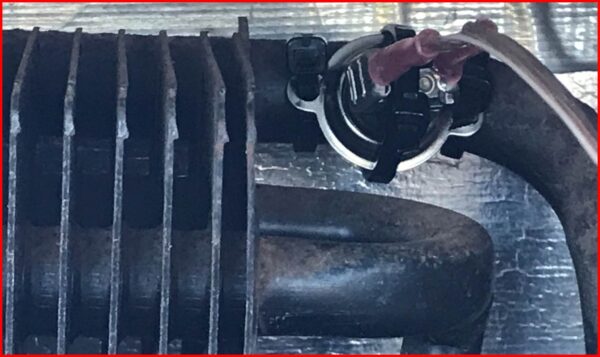
Simple.
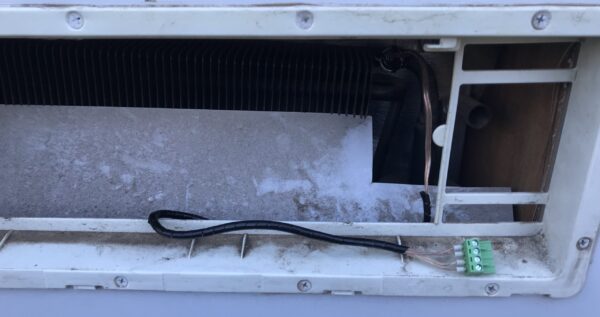
7. Attach the power supply cable
This was a simple case of getting the connector at the other end of the thermo switch cable…
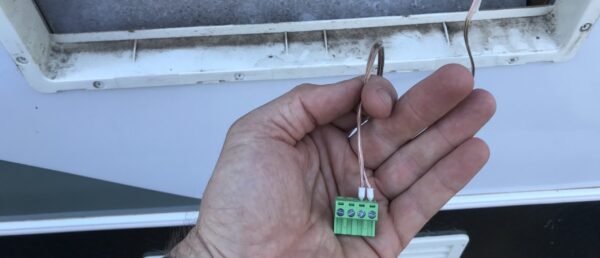
…then inserting the power cable and tightening the screws with the small flat blade screwdriver
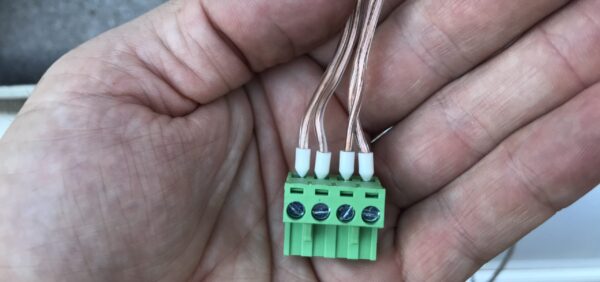
[noting that the far left wire is the 12V positive]
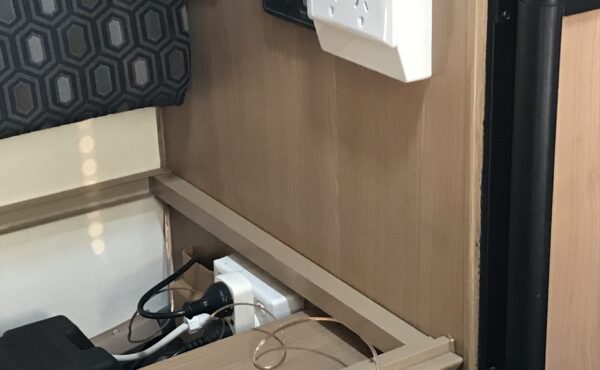
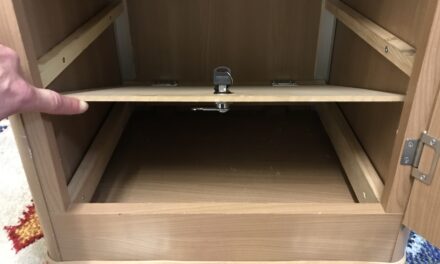
8. Run the power cable to power supply
There’s a few different options here:
- Tap into the fridge’s power supply
- Go straight to the battery, or
- Plug it into the Setec power supply
I chose to plug it into the Setec
(so that the thermostat wouldn’t be drawing power if we had our Jayco Swan stored with the battery switch off)
So because I was going in that direction I drilled a tiny hole…
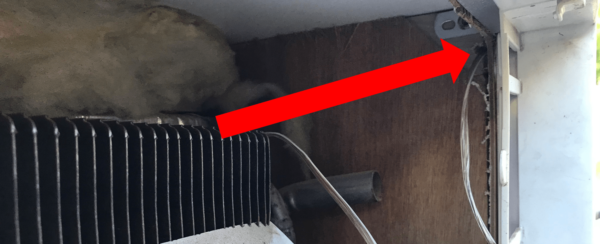
…and ran the cable into the box:
Neatened up using some of the remaining cable ties:
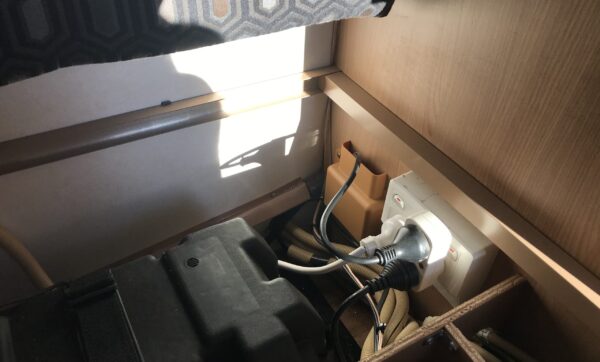
Then I neatened things up with the included spiral wrap:
9. Connect the fuse to the positive cable
Here I cut the power cable to length using the wire strippers.
Then I used the pliers to connect the:
- Fuse holder assembly, using the
- Connector, then
- Spade connector, before
- Inserting the fuse
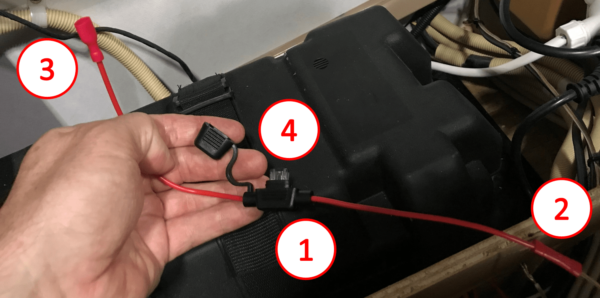
For the negative cable it was a case of simply crimping on a spade connector with the pliers
[all of this was included in the kit]
10. Plug it in and test to see if everything works
The final step was to:
- Make sure the battery switch was off
- Plug the spade connectors into the spare outlets in the Setec, then
- Turn the battery switch back on
Outside on the PCB controller I switched the switch from ‘AUTO’ to ‘TEST’
Success:
But the real test?
I put the vent back on then turned on the fridge…
…about 20 minutes later this happened:
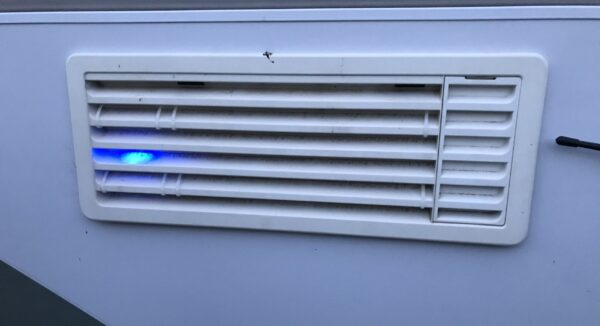
And, the fan kit turned itself off about 5 minutes after I turned off the fridge.
Summary: Installing a Klevakool Caravan Fridge Fan Mod Kit in a Jayco Swan camper trailer
Installing a caravan fridge fan mod kit is near the top of this list of the 35 Most Popular Jayco Camper Trailer Modifications
Knowing what I know now, I’d still recommend buying a Klevakool Caravan Fridge Fan Mod Kit here from 3DprintCQ:
Simple to install, fits like a glove, and every little thing you need for installation is included.
Comment below if you have any other questions about the installation process?


![Clothesline Modification for Jayco Camper Trailer [Using Bed Support Poles]](https://abigpeacheyadventure.com.au/wp-content/uploads/2020/04/Jayco-camper-trailer-bed-clothesline-modification-hang-between-the-support-poles-1-440x264.jpg)
Great article on the fridge fans. I assume no potential issues using them whilst driving?
Hi Stephen, thank you, and great question. We drove in 44 deg weather last weekend here in SA so it would have been on the whole time… worked fine when we arrived
Great work on the install. Now you have it running are the fans audible from inside the van on a quiet night? I am looking to improve the fridge but don’t want the constant noise some fans can produce at high speeds.
Thanks julian
Thans Julian! No, they’re not audible… I find myslef going out to check to see if they’re on! Cheers
Does it keep the fridge noticeably cooler while running of the battery?
I’d like to be able to use our battery and solar for remote camping just in case we run out of gas.
Cheers
Hi Brendon, it does – between this and the internal fan, it made it both cooler AND quicker time to cool back down after fridge door had been opened