
Disclosure: When you click on links to various merchants on this site and make a purchase, this can result in this site earning a commission. Affiliate programs and affiliations include, but are not limited to, the eBay Partner Network
In this article I’ll show you how I installed a Rola Titan Tray with a Rola Low Mount Kit on our Pajero Sport QF
I’ll share:
The specific parts I bought.
The tools I used, and
Each of the steps involved
(I’ll also point out some of the dos and don’ts I learned along the way)
Let’s get started with the first step:
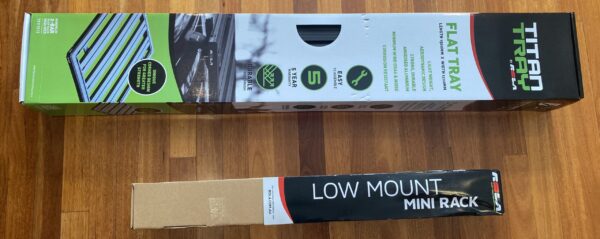
1. Buy a Rola Titan Tray and Rola Low Mount Kit
If you’ve already got both of these, skip this bit and go to Step 2.
But if you haven’t?
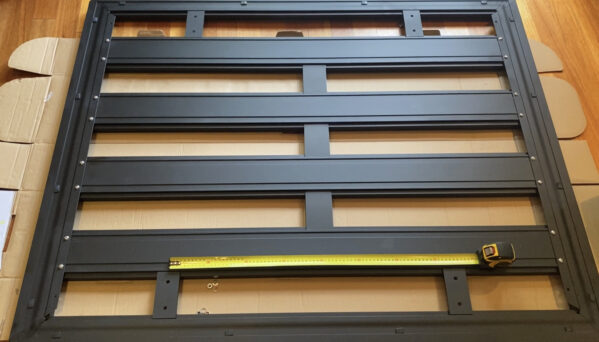
I bought the Rola Titan MK2 Roof Tray 1500mm x 1200mm from Anaconda on sale for $545
Now they usually retail for around $730…but you’ll regularly find at least one seller (usually Supercheap Auto) has them on sale for around $550 – $580
The part number for the Rola Low Mount Rail Kit is LRS002…
…and the best place I could find to get it was here from A1 Roofracks
HINT: If you get the tray before the mount kit DO NOT put it together just yet. You’ll have to pull it apart again!
2. Gather the tools you’ll need
Except for a pair of scissors, the only tools I needed for this installation were a:
- Phillips head screwdriver
- Flat head screwdriver13mm socket
- 13mm open-ended spanner, and a
- Tape measure
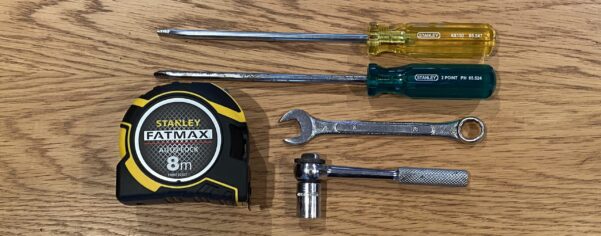
(the Allan Key that I used comes with the Low Mount Kit)
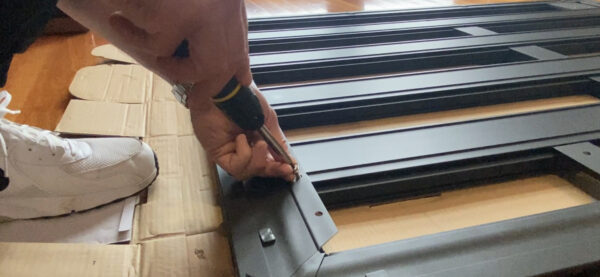
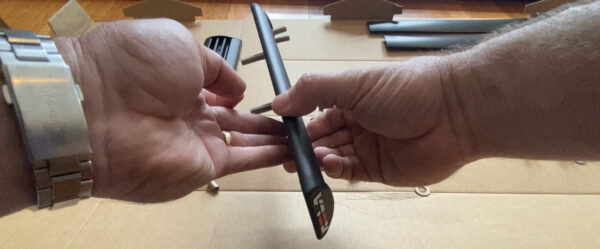
Also, those 2 separate screwdrivers are for this picture only:
I use one of these S for just about everything!
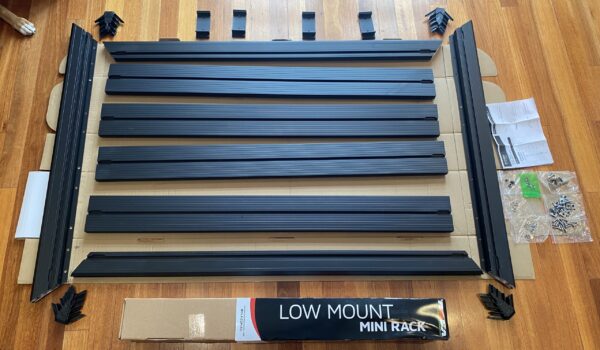
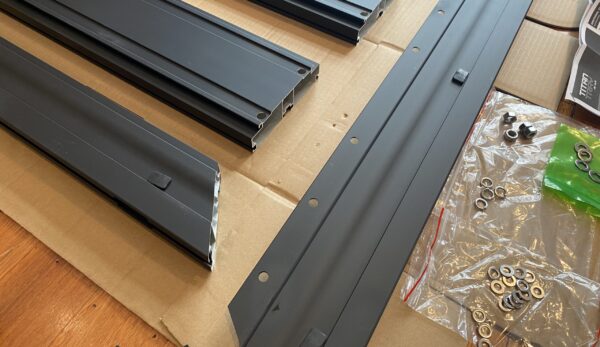
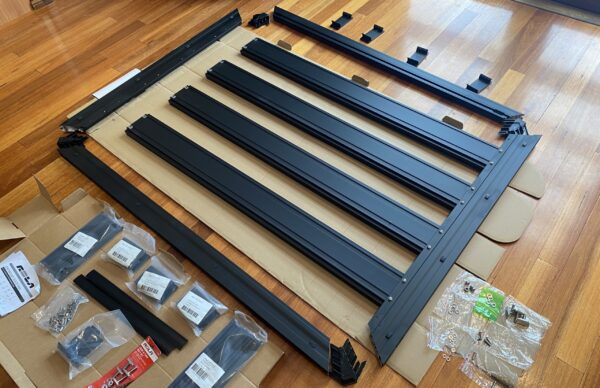
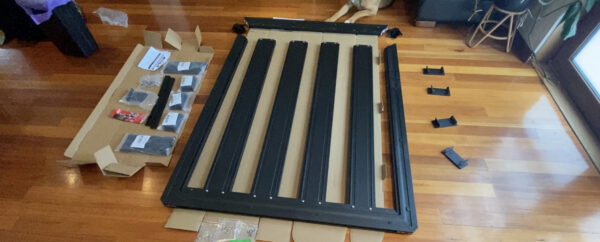
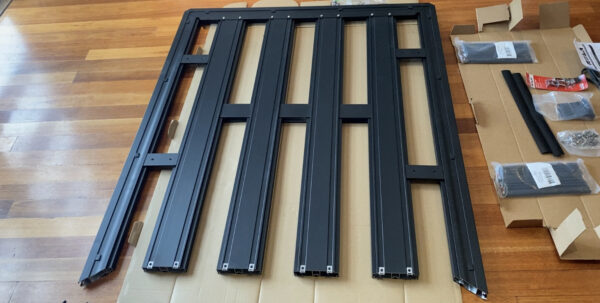
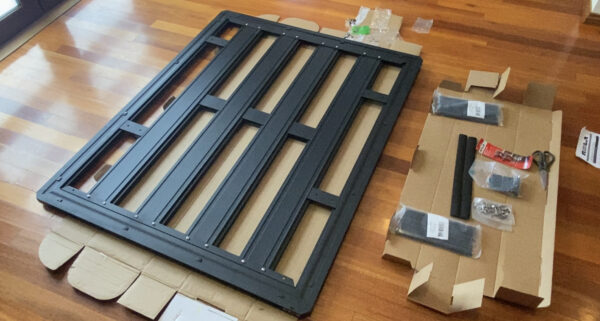
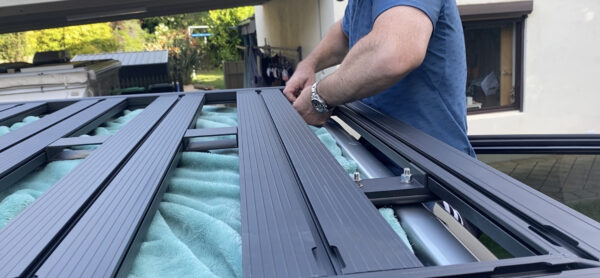
3. Lay the tray out upside down
This will give access to the holes to bolt the Inner Planks to the Front/Rear Planks
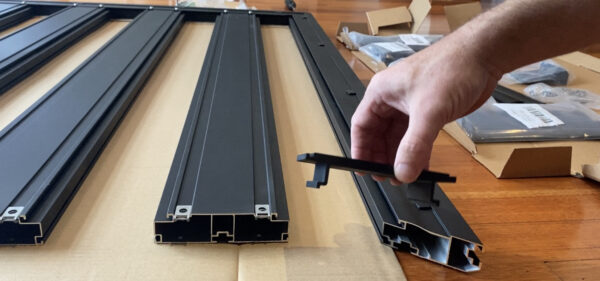
4. Attach the U Nuts to the ends of the Front/Rear Planks
Slide all 16 of the U Nuts over the holes in each end of the Front/Rear Planks
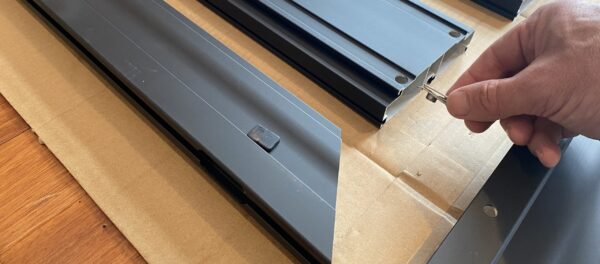
(the protruding side which has the thread for the screws face downwards)

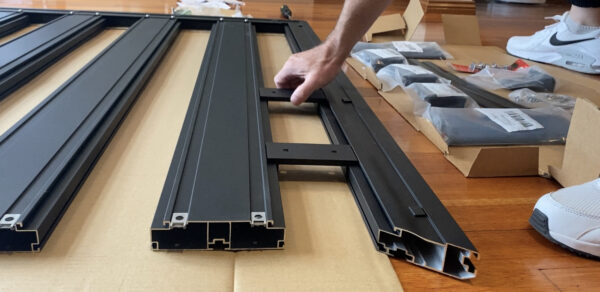
5. Bolt one end together
Place one of the Front/Rear Planks over one end of the Inner Planks making sure that the holes are in alignment…
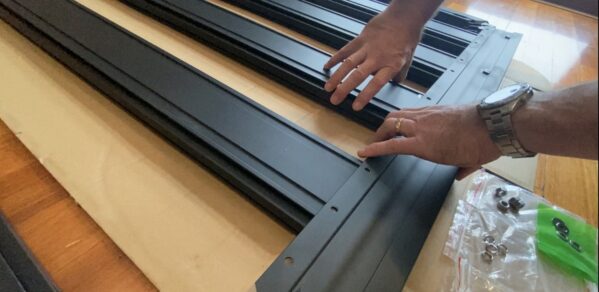
…then screw together (loosely) using the M6 Screws and washers
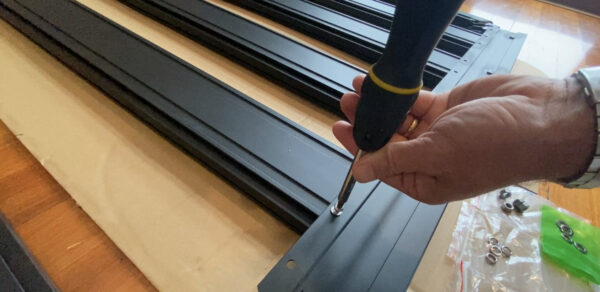
HINT: Don’t tighten the screws too much otherwise you’ll find a couple of upcoming steps really hard
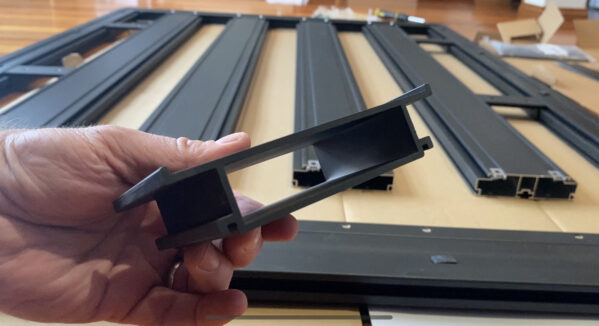
6. Join the Side Planks using the Corner Pieces
Push 2 Corner Pieces into the partially assembled Front/Rear Planks…
…then slide the Side Planks onto the other side of the Corner Pieces:
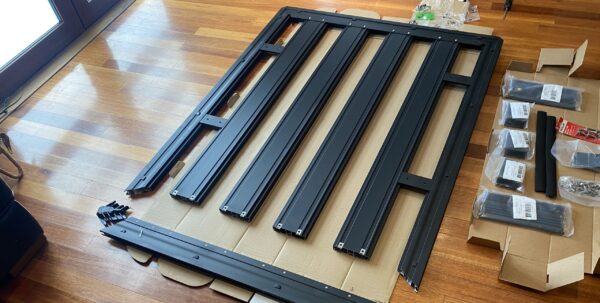
You’ll be left with what looks like the completed tray but with one end missing:
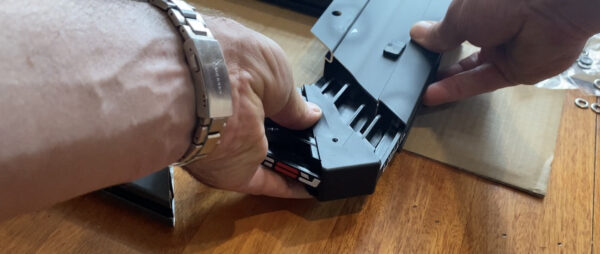
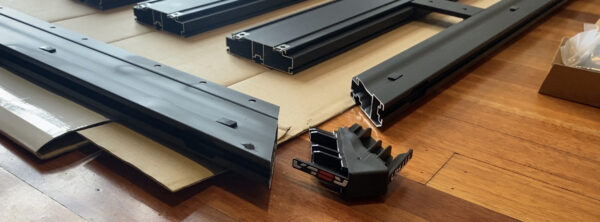
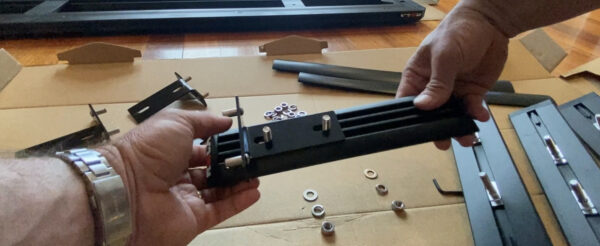
7. Insert the Mounting Blocks
Here’s where having the screws loose helps out.
Slide 2 of the Mounting Blocks between the outermost Inner Planks and the Side Planks
(don’t worry, you can’t put them in upside down as they only fit in one way)
Repeat on the other side, and then stop!
Now is where you start with the Low Mount Kit…
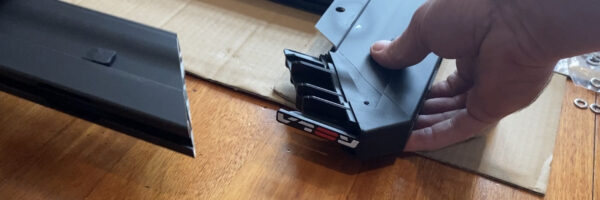
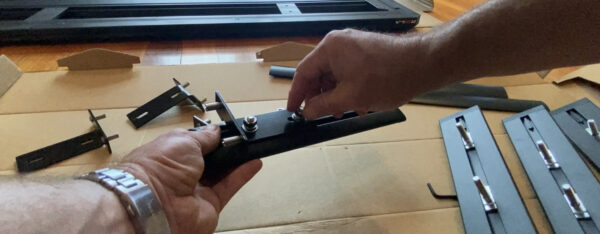
8. Start installing the Rola Low Mount Kit by inserting the Interconnecting Blocks
So this is the part where people who’ve pre-assembled their tray have needed to go back a step:
You need to have one of the Front/Rear Planks off to insert the Interconnecting Blocks.
The good news is these just slide in exactly the same way as the Mounting Blocks
(but just fill in the gaps that don’t already have the Mounting Blocks)
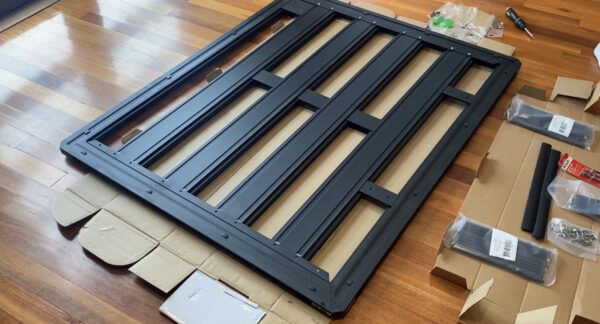
9. Join the second Front/Rear Plank using the Corner Pieces
Now you can finish assembling the tray:
HINT: Don’t make the same mistake I did of inserting a Corner Piece into a Side Plank. The prongs will be facing in the wrong direction and you won’t be able to get it together. They’re a pain to get back out!
Push the remaining Corner Pieces into either end of the the Front/Rear Plank.

Slide the prongs into the Side Planks and you’ll now be left with what looks like a complete tray:
10. Bolt the other end together
Screw together, then tighten the other end.
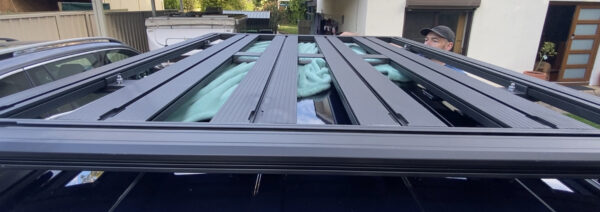
You now have a completed Rola Titan Tray that’s ready to be mounted using the Low Mount Kit:
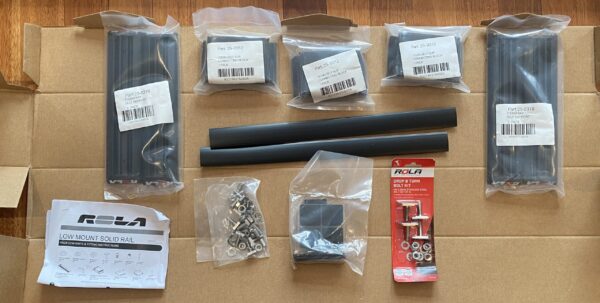
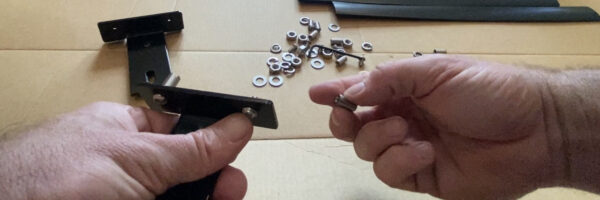
11. Insert the channel bolts into the Low Mount
Pop an end cap off one end of the Low Mount.
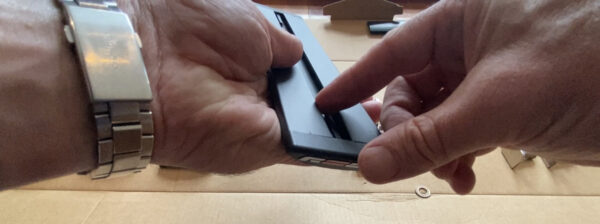
Once you’ve done this, insert 2 of the larger M8 Drop-&-Turn Bolts into the top channel of the Low Mount…
…and 2 of the smaller M8 T Bolts into the bottom channel of the Low Mount.

Replace the end caps…
…, and repeat for all 4 Low Mounts

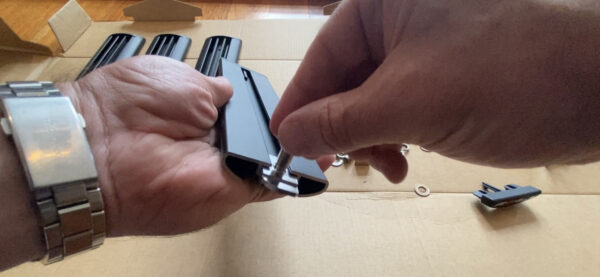
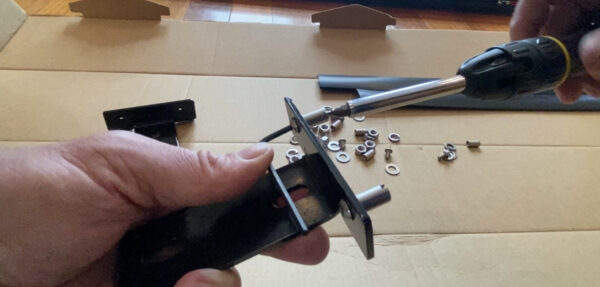
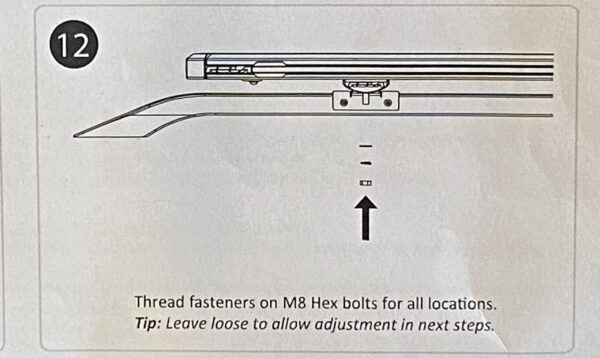
12. Assemble the Rail Straps
This is simply a case of pushing an M5 Bolt through each of the holes in the back of the Rail Straps…
…then tightening some Anchor Nuts using a flat head screwdriver and the supplied Allan Key.
13. Attach the Rail Straps to the Low Mounts
DISCLAIMER: Here is where I have deviated from the official instructions so ignore this part if you wish!
I initially attached the Low Mounts to the underside of the tray but that didn’t seem to make sense to me:
This would mean needing to line up the holes of the Rail Straps with the Low Mounts once everything was on the roof AND then trying to bolt everything together from underneath
So instead:
I attached the Rail Straps to the underside of the Low Mounts…
…and fastened them with a flat washer, then a spring washer, then the M8 Hex Nuts
HINT: Tighten up the nuts just enough so that the Rail Strap will still slide on the Low Mounts BUT not too loose (it will save on the number of fiddly turns that’ll be required later). Finger tight was enough here.
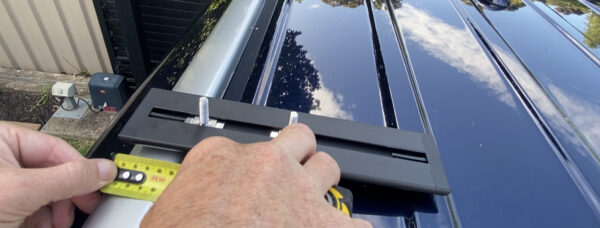
14. Position the Low Mount Kit on the roof rail
The Anchor Nuts of the Rail Strap simply push into the rubber grommets on the inside of the roof rail on a Pajero Sport.
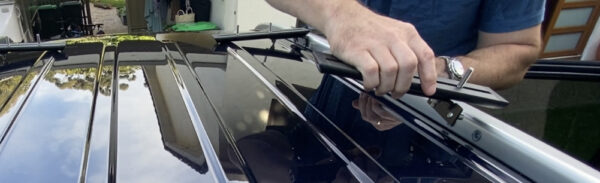
Here you can see all 4 pushed in:
(relax, they’re only lightly resting on the roof, and once the Low Mounts are bolted to the Mounting Brackets of the tray they pull up level of the roof)
More on that later.
Now, the outer-holes in the Mounting Blocks of the tray are 935mm apart…
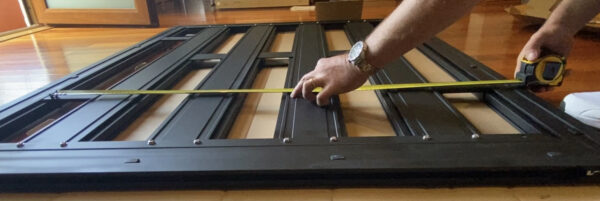
…which means that to line up the outer Drop-&-Turn Bolts, the edge of Low Mount needed to be pushed out by 50mm
(which was pretty much lining up with the outside edge of the roof rail)
Also:
The holes in each Mounting Block are 65mm apart…
…so I slid the bolts in the channel to line up with the holes.

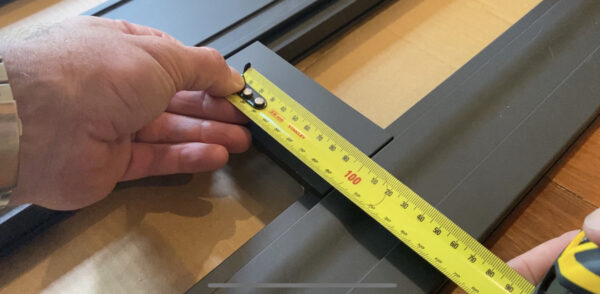
15. Position the tray Mounting Blocks the correct distance apart
The front-to-back distance between the bolts of the Low Mounts was 750mm…
…so I slid the Mounting Blocks the match.
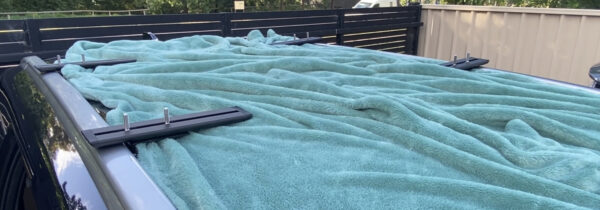
16. Protect the roof of your Pajero Sport
Now that everything’s all lined up, the final part of preparation was to cover the roof of my Pajero Sport with a blanket to prevent it from getting scratched during the installation of the Rola Titan Tray..
17. Lift the tray onto the mounts
This is the part where I don’t recommend you do what I did:
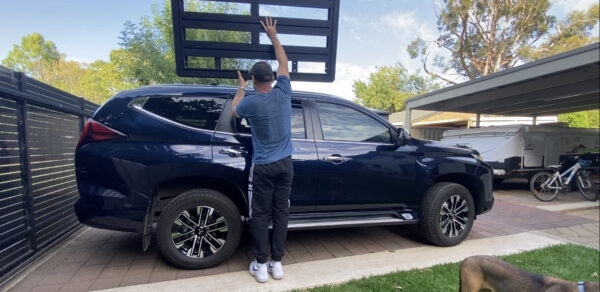
Lifting the tray up onto the mounts is a 2-person job
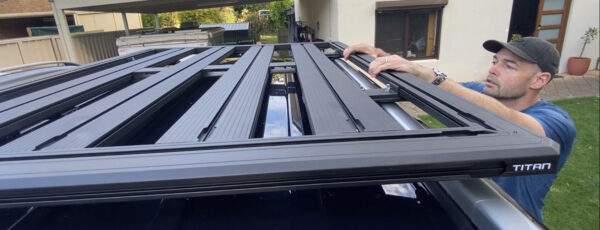
18. Bolt the Rola Titan Tray to the Low Mount Kit
If you’ve already fitted the Low Mount Kit to the roof of your Pajero sport then once the tray is up it’s simply a case of making sure the bolts line up with the holes of the Mounting Blocks…

…and securing with the flat washer, then a spring washer, then the M8 Hex Nuts
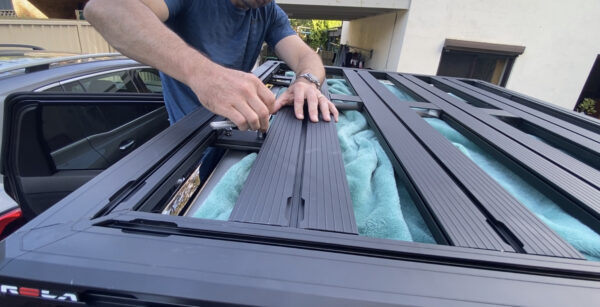
(here’s where I used used the 13mm socket)
19. Secure the Low Mount to the Rail Strap
Ater a confirmatory check that that the tray was lined up correctly…
…it was time to tighten those loose bolts between the Low Mount and the Rail Strap.
If I can be honest:
This was the fiddliest part of the whole thing, which is why I suggest:
- Attaching the Low Mount to the Rail Strap instead of direct to the tray Mounting Block
- Tightening up the nuts as close to tight as possible to minimise the number of turns, and
- Leaving the blanket in place
Around 5-10 mins with the 13mm open-ended spanner and it was done though
(I’m just glad I didn’t follow the instructions and start the nut at the end of the bolt!)
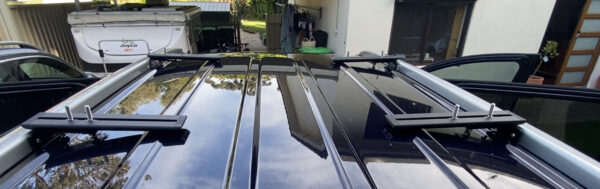
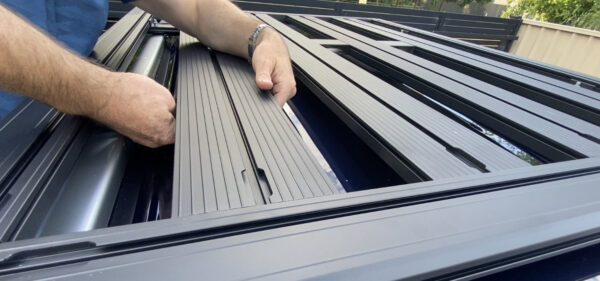
20. Remove the blanket and admire your work
I quickly removed the blanket before my wife caught me using it for a roof rack installation and told me off
(she’ll never read this ha ha)
Now that’s a low mount:

That’s not going nowhere:
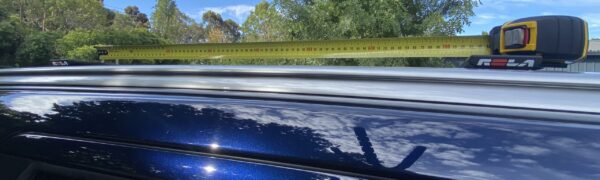
21. Final touch
I stuck the tape measure under the tray to see how much track was left in the Low Mount to find out what the length of the Under-Cover Strip was needed…
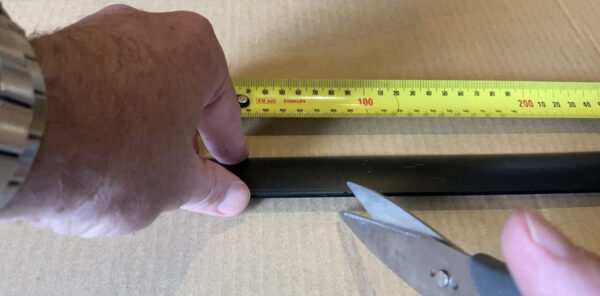
Then I cut the Under-Cover Strip with scissors, and clipped it on up from underneath:
Done.
(To be honest… I’m still wondering why I even needed to do this step, and was close to bailing)
Summary: Installation of Rola Titan Tray and Rola Low Mount Kit on Pajero Sport
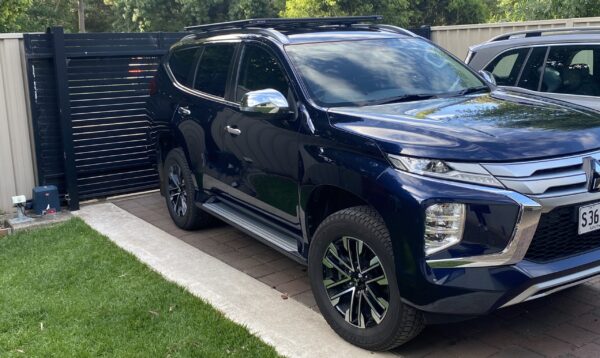
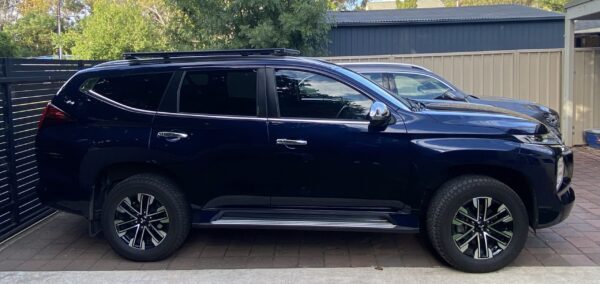
This is how the 1200mm x 1500mm Rola Titan Tray looks on my Pajero Sport when installed with a Low Mount Kit:
I think it looks neat and tidy, and is only a few millimetres higher than the aerial fin on the back of our QF Pajero Sport
If you’re after one I’d check here on eBay to see if you can find one in the $550-$580 range…
…and even now I still can’t find anyone better than A1 Roofracks for the Low Mount Kit
So let me know:
Anything you’d do differently?
PS: This is my first article to do with my Pajero Sport… everything else on this website is about caravanning, camping, and Jayco Camper Trailers. If you also tow a Jayco Camper you might like…
Mate, you are a legend for posting this!!!!
Also, I assume as you didn’t mention it in your step by step guide, the curvature adapters aren’t actually required, or was it something you discovered later on???
This is pretty much exactly what I need to do except with the 1800 long version. You are a champion for sharing the knowledge in detail. Thank you, thank you. Cheers
Great post, with logical steps for the installation. EXACTLY what I was looking for. Are you happy with what youve got after 6 months? Interested to know
Hi Nels, thank you! If my car was stolen tomorrow and I replaced it with another Pajero Sport, I would go for this set-up again
Wonderful instructions- managed to install without the husband.. winning!! Thank-you!!
Thanks for this. I was struggling to get an idea of how the low mount kit actually attached to the car. Most likely going to order very soon.
One question, does the rack produce much additional wind noise?
Hi Richard, no, a little whooshing but nothing that means I need to turn the stereo up
Thanks for this, looking at the same setup for our car.
Hi I forgot to put the clip in plastic strip should loosen it up and try to insert under low mounts that sit on rails. Cheers awesome thread btw