Disclosure: When you click on links to various merchants on this site and make a purchase, this can result in this site earning a commission. Affiliate programs and affiliations include, but are not limited to, the eBay Partner Network
Here I’ll show you how I installed a Klevakool caravan fridge internal fan kit in our Jayco Swan camper trailer.
These small 3-way fridges tend to get packed tight which limits air circulation
[this also keeps the cold air next to the thermostat which gives a false reading]
The internal fan kit solves this problem.
But if the fridge isn’t running well in warmer weather in the first place?
Then here’s the first step:
1. Install a caravan fridge external fan mod kit
If your fridge isn’t generating cold air in the first place, then an INTERNAL fan won’t make too much of a difference.
Installing one of these EXTERNAL fan mod kits helps to address a common problem in Jayco camper trailers:
Heat can’t escape from behind the fridge which effectively makes it stop cooling.
These 12V fan kits help to remove the trapped heat so the fridge can work more efficiently
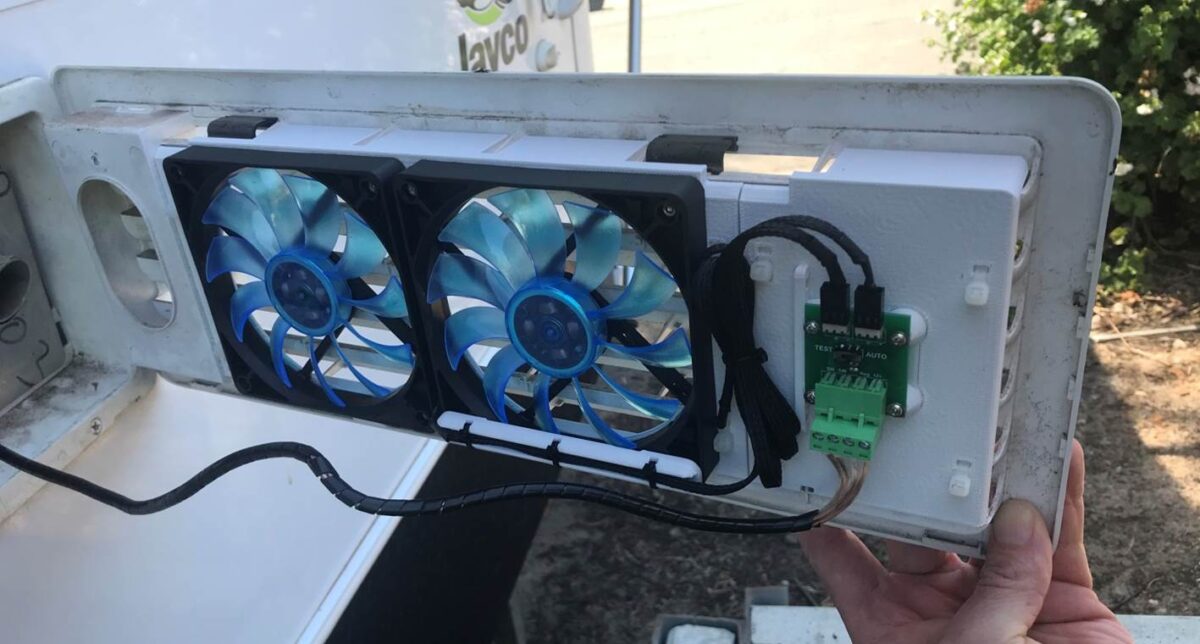
[they’re that good they ranked 3rd in the list of the 35 Most Popular Jayco Camper Trailer Modifications]
2. Buy a Klevakool Caravan Fridge Internal Fan Kit
These are made by 3DprintRV (the same place I bought my external fan kit)
This is what was included in my Klevakool caravan fridge internal fan kit:
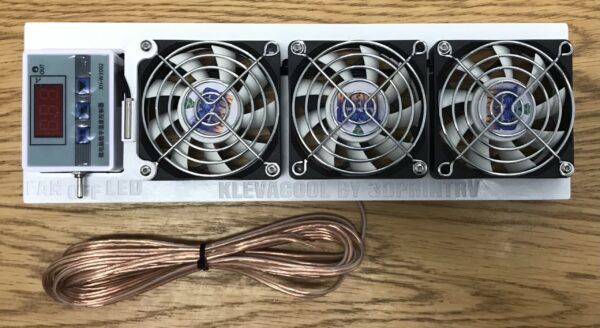
- Thermostatically controlled fans that are mounted on a 3D printed base
- Power cable
- Bootlace terminals
- A plastic filament
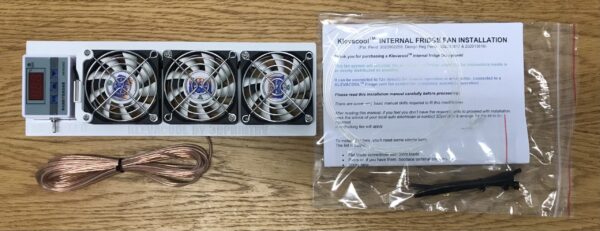
As soon as I opened the box it looked like one of my final comments from this article about the external fan mod kit was relevant here too:
Simple to install, fits like a glove, and every little thing you need for installation is included.
3. Tools used for the internal fan kit installation
Here’s everything I needed:
- Small flat blade screwdriver
- Wire strippers
- Pliers
Although it’s not a tool, it’s worth mentioning I also used a bit of sticky tape.
4. Remove the vent covers from the side of the van
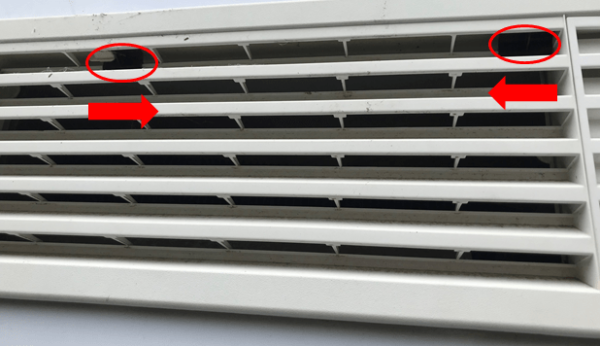
Remove both covers because you’ll need access to both the top and bottom vents.
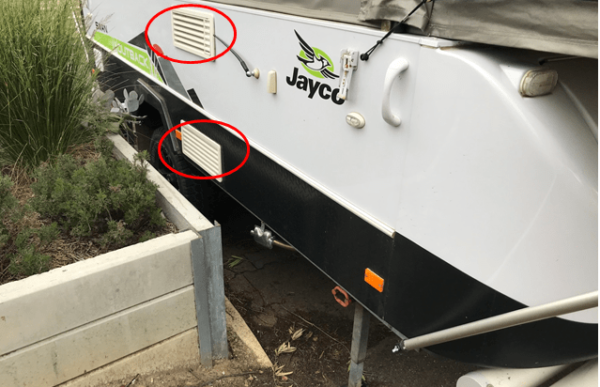
To remove the vent cover it was a case of simply sliding over these little black locking slider clips:
5. Use the plastic filament to feed through the power cable
One option is to feed the power cable through the hose that runs outside from the drip tray.
Our Thetford 3-Way Fridge doesn’t have a drip hose though (it has a solid drip tray that you need to empty by hand).
So instead I ran the plastic filament through the hole that the thermostat probe comes out of:
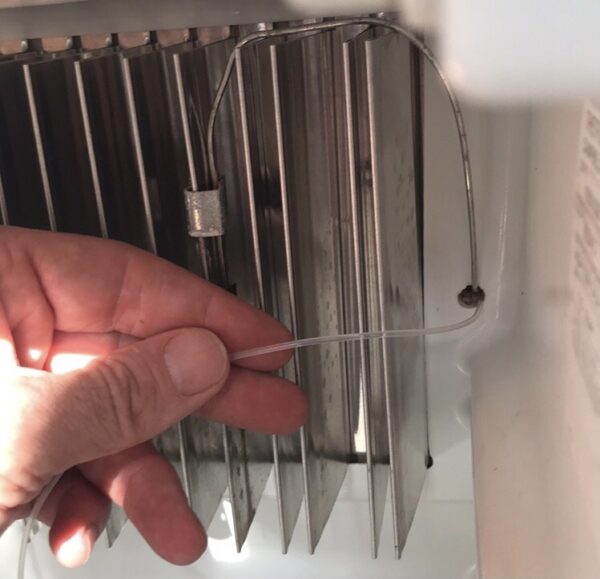
Then it was just a case of sticky-taping the power cable to the plastic filament…
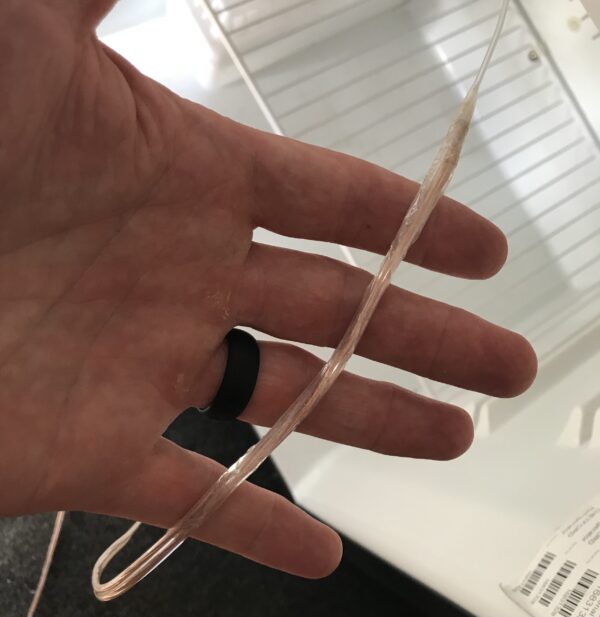
…and then on the outside pulling the plastic filament through the bottom vent
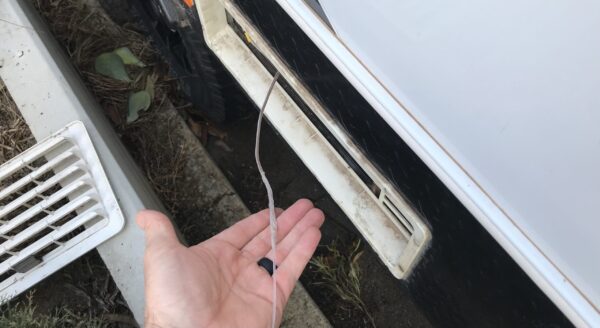
[which brings the power cable through too]
6. Press the base of the fan onto the fridge’s cooling fins
Here’s where it makes sense to buy a 3D printed fan kit that’s designed for this purpose:
All I needed to do was line-up these metal clips…
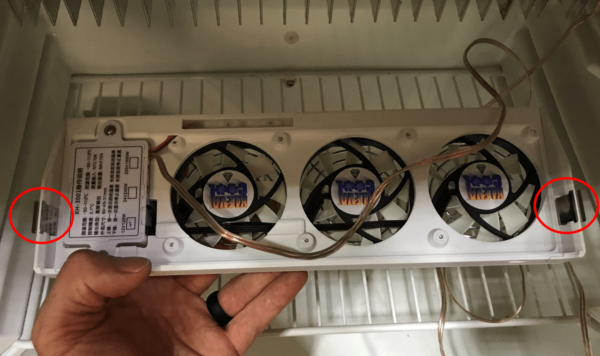
…and the unit clipped straight onto the cooling fins.
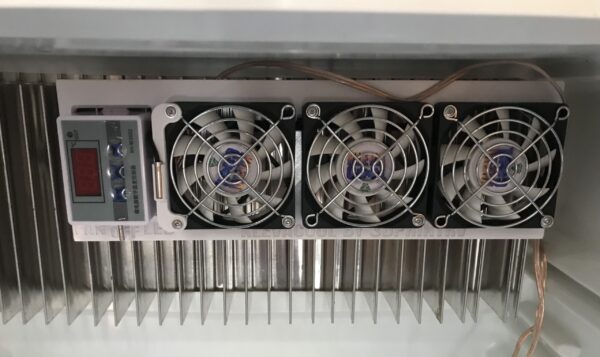
Then from the outside I pulled the rest of the wire through so it was neat and tidy inside the fridge:
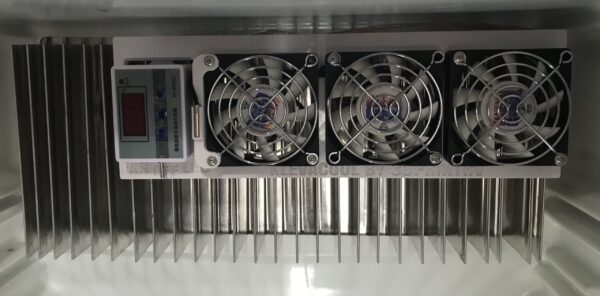
7. Connect the power cable to the external fan kit’s PCB connector
Here I pulled the power cable up out of the top vent…
…then cut it to a length so it could neatly join in with the external fan mod PCB connector.
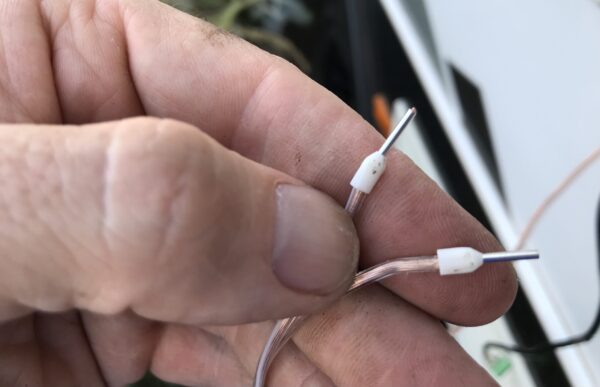
I used the wire strippers to leave about 10 mm:
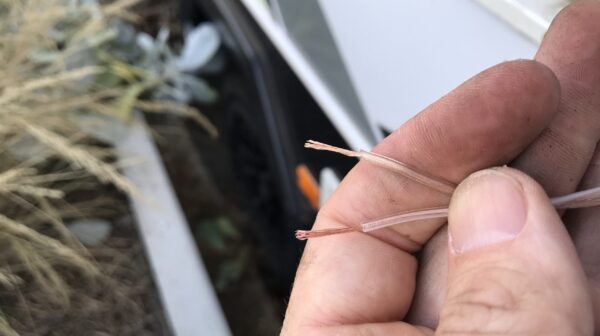
And then used the pliers to crimp on the bootlace terminals.
Using the small flat bladed screwdriver the power cable just plugged into the PCB connector of the external fan mod kit
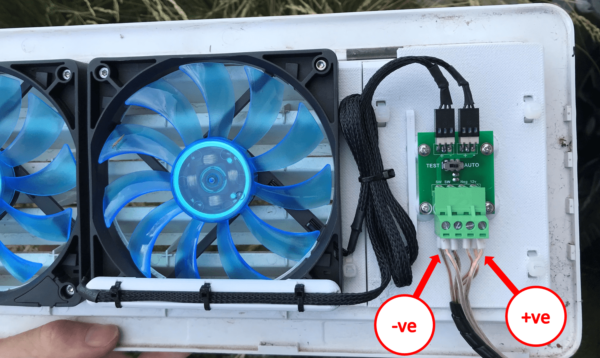
[the wire with the white stripe is the Negative]
8. Test to see if everything works
After making sure that the battery switch was on, the final step was to move the PCB controller switch from ‘AUTO’ to ‘TEST’
This turned on the external fan and gave power to the internal fridge fan.
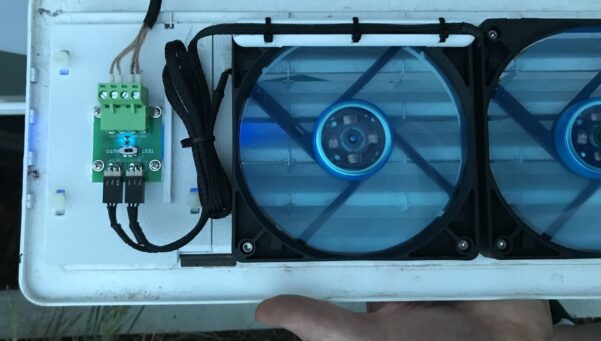
When I flicked the switch to ‘FAN’…
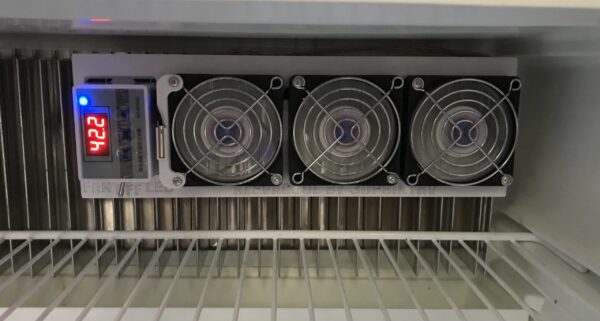
Success!
And to ‘LED’… pretty:
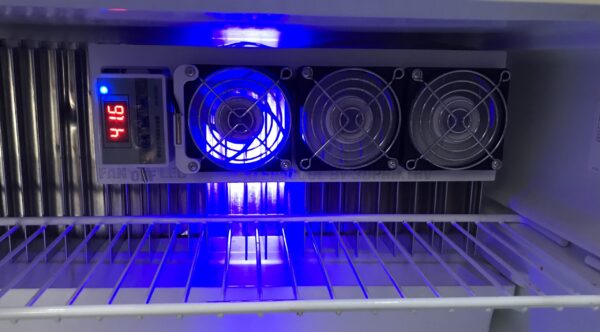
[and yes it really was that hot in our Jayco Swan the day I installed this!]
But the real test?
I plugged our Swan into 240V and turned on the fridge…
…and about 20 minutes later both the external and internal fans turned on
The next morning:
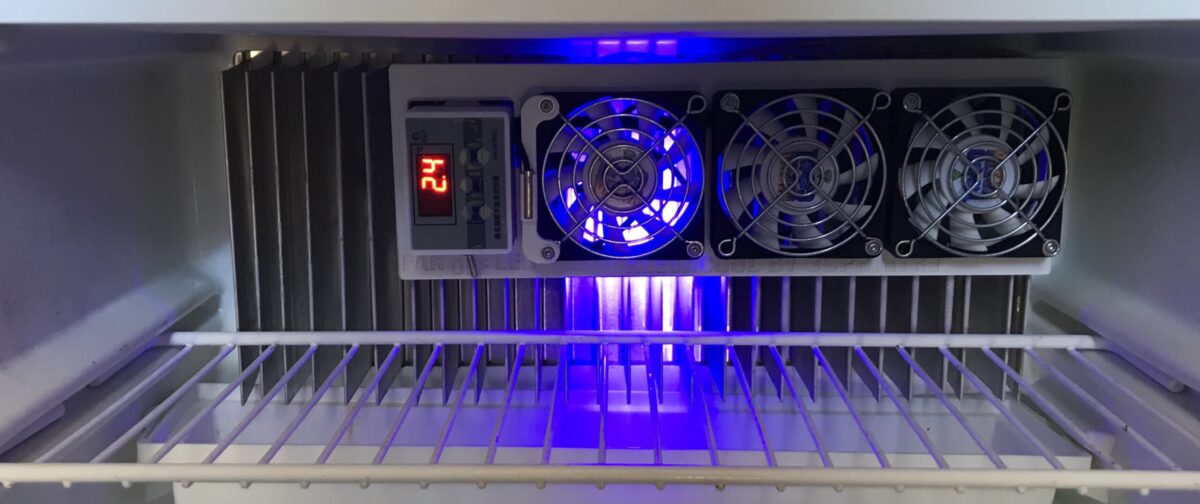
That was A LOT quicker!
Summary: Installation and review of the Klevakool Caravan Fridge Internal Fan Kit
Here’s how I installed an internal fan in our Thetford 3-Way Fridge in our Jayco Swan.
I found this Klevakool caravan fridge internal fan kit (here from 3DprintRV) to be very well made and easy to install:
It solves the problem if the fridge is full which limits circulation.
But remember:
The external mod should be installed first because it provides the biggest improvement in fridge performance.
Click here if you would like to see the installation and review of that one…
…or here for the rest of the 35 Most Popular Jayco Camper Trailer Modifications

![Caravan Fridge Internal Fan Installation: Jayco Swan [Thetford 3-Way]](https://abigpeacheyadventure.com.au/wp-content/uploads/2020/12/Klevakool-Caravan-Internal-Fridge-Fan-Kit-in-Jayco-Swan-Camper-Trailer-Thetford-3-Way-Fridge-1280x640.jpg)
![Jayco Swan Fiamma Awning Installation [Step-By-Step With Pictures]](https://abigpeacheyadventure.com.au/wp-content/uploads/2020/09/Jayco-Swan-Camper-Trailer-Fiamma-Awning-Installation-440x264.jpg)
![Ever Rest Memory Foam Mattress Topper Review [For Jayco Camper Trailer]](https://abigpeacheyadventure.com.au/wp-content/uploads/2020/04/Most-Popular-Modification-for-Jayco-Camper-Trailer-Add-A-Mattress-Topper-440x264.jpg)