Disclosure: When you click on links to various merchants on this site and make a purchase, this can result in this site earning a commission. Affiliate programs and affiliations include, but are not limited to, the eBay Partner Network
In this article we’ll cover the 9 time saving tips that we’ve found to be most helpful when it comes to setting up our Jayco Swan camper trailer.
These make our set-up time so much quicker, easier, and less stressful.
I’ll be honest:
Some of these save a lot of time while others only save a minute or two…
…but it all adds up.
Let’s get started:
1. Stick a T spirit level to the drawbar
The beauty of having a T spirit level on your drawbar is that it really simplifies the levelling process:
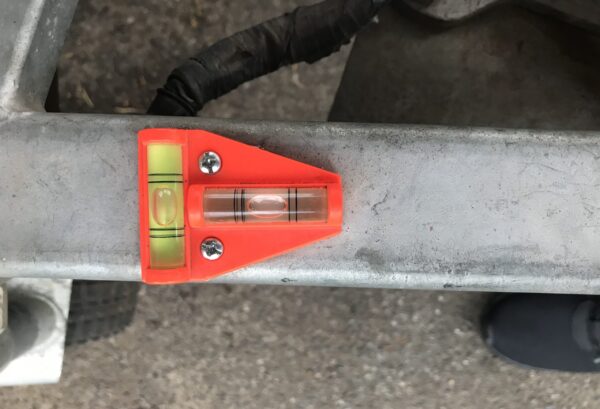
When you stop you can just get out and immediately see how level you are side-to-side
[this way you can see if you even need to get your levelling ramp out]
Then, levelling front-to-back with your jockey wheel is a breeze:
There’s no digging around in your tools for a spirit level
(or messing around with cups of water inside the camper)
These make the list of the 35 Most Popular Jayco Camper Trailer Modifications…
…and when it comes to time saving tips, they’re the best $5 you’ll ever spend here off eBay
2. Store the bed support poles and hockey sticks under the mattresses
This one isn’t just about time saving tips:
It’s surprising how often people accidentally leave their bed support poles and hockey sticks at home
(that would REALLY ruin a holiday)
A guaranteed way to make sure you NEVER forget them AND speed up your set-up process is store them under each mattress:
Whenever we pack up, the hockey stick goes under the front of the mattress, and the bed support poles go under the back of the mattress.
…
This way, whenever we’re setting up they’re always within arms reach right when we need them.
3. Mark extendable poles with texta or black tape
The poles on our bed end flys are always set at the same length.
I used to set-up. Walk back. See it wasn’t level. Adjust. Repeat once or twice.
…
Now, a bit of black tape and texta… done.
4. Use a roll-up table instead of a folding table
One of the biggest time saving tips is to have as few items as possible loose in the camper.
We used to travel with a folding table that we bought from Bunnings.
It lived on the folded-down kitchen dinette during travel…
…but this meant we always had to get it out during the set-up process.
Even if it wasn’t being used.
We switched to a roll-up table.
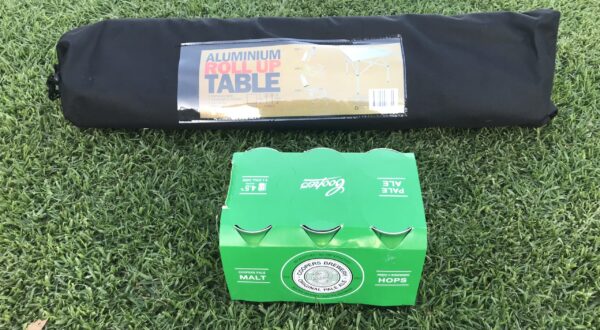
One of these means you can keep it in the boot and it doesn’t need to be bought out until it’s used
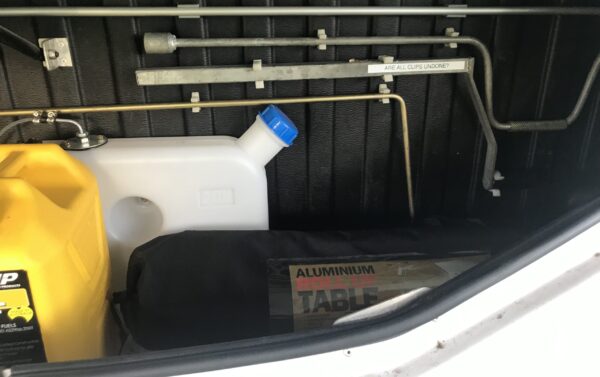
(this way you don’t need to get it out off the bed/floor during set-up)
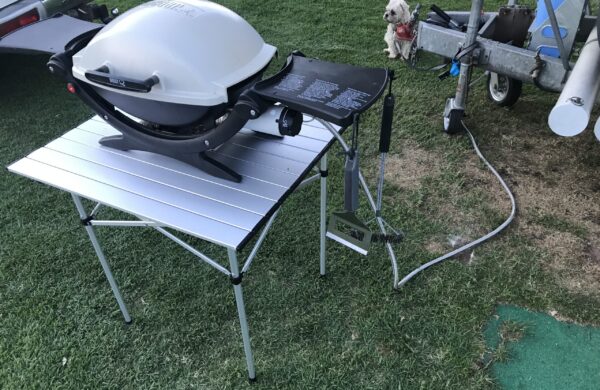
We bought ours from BCF but you can find the same ones cheaper here on eBay
[BONUS: Today we stopped, got the table out of the boot, and set it up to make sandwiches. We couldn’t have done this with a folding table that lived inside the camper]
5. Use collapsible camping chairs instead of folding deck chairs
We used to travel with folding deck chairs.
Sure they were comfortable, but they:
- Took up a lot of space
- We needed to get them out during set-up, and
- They had to live outside even when not in use (even when raining)
(there’s nothing more annoying than having chairs outside that are getting wet even though they haven’t even been used)
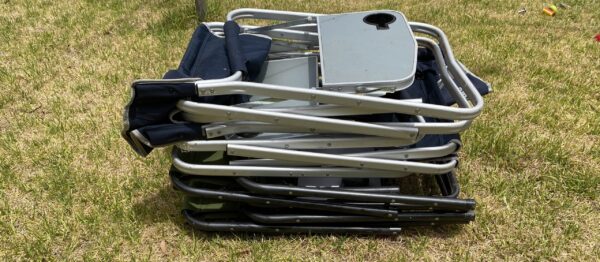
So we switched to collapsible chairs rather than folding chairs:
Chairs for our family of 5 now fit in our tunnel boot… so we only have to get them out IF and WHEN we’re using them
This way we don’t need to get them out during set-up…
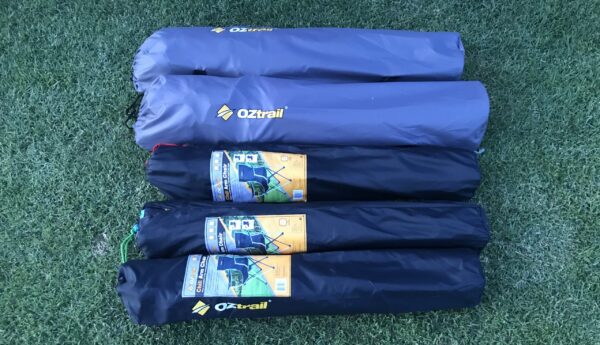
…and there’s less things left laying around our campsite when we’re not there.
We bought these from Bunnings when they were on sale, but you can also get them off eBay:
OZtrail Coolboy Chairs for us adults, and these OZtrail Chill Arm Chairs for the kids.
6. Do the bed end fly mod
This mod saves a bit of time but there’s heaps of other benefits too:
No ropes.
No poles to the ground.
Keeps things dry in set-up or pack-up if it’s raining
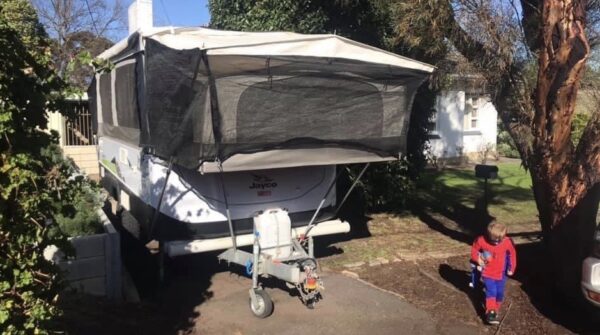
(so no need to mess around with bed covers which saves even more time)
We bought the attachments from SupaPeg via eBay
Read: Bed End Fly Modification For Jayco Swan Camper Trailer (Our Review)
NB: you still have the option of using guy ropes if it gets really windy… Ropes become an option not a necessity
(although we’ve never once needed to do this)
7. Swap the bag awning for a roll-out awning
In all honesty:
Changing from a bag awning to a Fiamma awning would be our single biggest time saving modification
We no longer need to put out the awning during the set-up process…
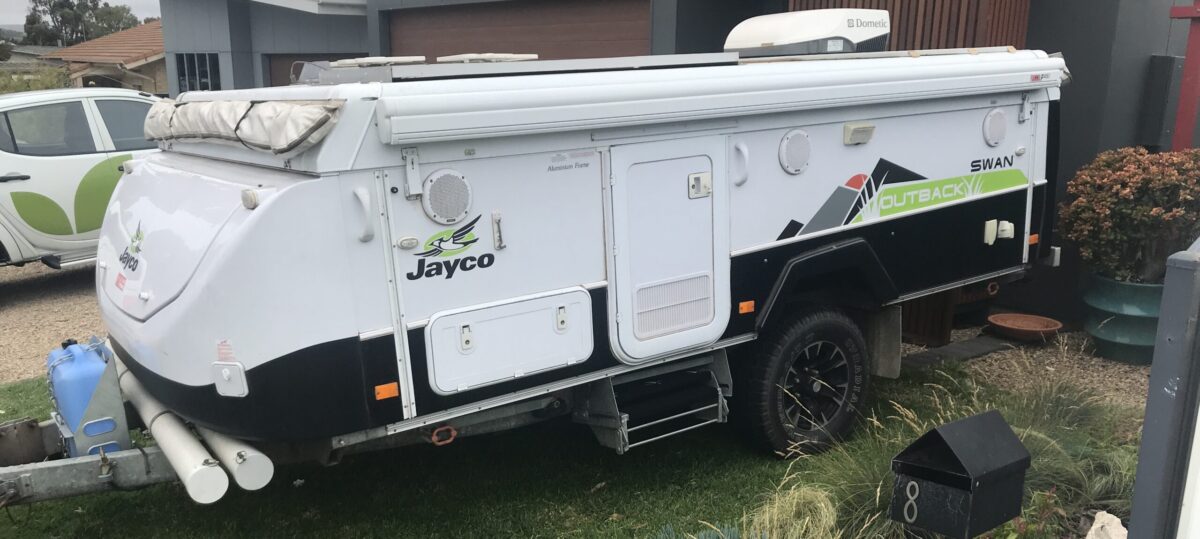
…and unlike the bag awning, we can put it out afterwards
(not only is it way faster, but this way you don’t have to commit to having your awning up during set-up)
No more messing around with poles. It’s done in about 1 minute. You can easily put it in if the weather gets bad. You can put it away the night before leaving to make a quicker pack up in the morning.
Read: Jayco Swan Fiamma Awning Installation [Step-By-Step With Pictures]
8. Keep the camper packed as much as possible (and create a packing list)
One of the biggest downsides of a Jayco camper trailer is that it’s not easy to put everything in its place before you travel:
The first few trips in our Jayco Swan we spent almost as much time putting things into cupboards after setting-up as we did with the set-up itself
(the alternative was setting up in the driveway but we wanted to avoid this if possible)
So now we save time by keeping the camper stocked with pretty much everything that’s needed for a trip (except for clothes and fresh food). Things that live in our camper include:
- Towels and bedding
- Spare toiletries
- Non-perishable food
Everything needed for cooking and eating
Then, before we leave, we consult our ‘Swan Packing List’ and just check off the things that we need depending on where (and how long) we’re going
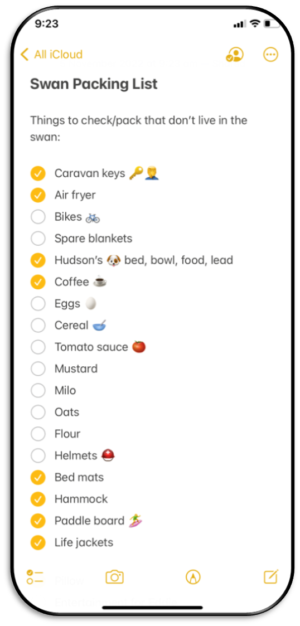
‘Caravan keys’ are a recent addition after a bit of a mishap… oops!
9. Create your own set-up checklist
This one’s especially worth doing if you don’t get away camping as often as you like:
Setting up and packing down a Jayco camper trailer is mostly a sequential process…
…and doing things out of order can make things a lot harder
(or make you need to backtrack which takes even more time)
We have a simple checklist that we briefly re-read just before setting-up to remind us the best order for our set-up
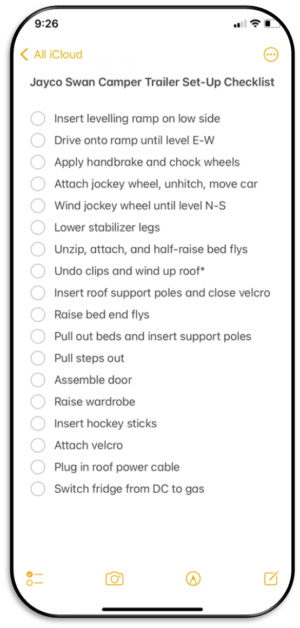
[yours might be slightly different based on whether you’re using your bed end flys, are setting up a bag awning, etc]
Read: Our Jayco Camper Trailer Set-Up Checklist
OTHER: Install drop-down legs if wind-down stabilisers need replacing
This isn’t one that I’d necessarily recommend if nothing’s broken.
But, our previous caravan had wind-down legs, while our Jayco Swan OB has drop-downs…
…and it’s something that I noticed as making a BIG difference
(they just drop down and only then need a slight adjustment)
So, if one of the wind-downs ever breaks (or you’re just finding the winding difficult) I’d always recommend replacing with drop-downs.
How long does it take to set up a Jayco camper trailer?
A common question is: how long does it take to set up a Jayco camper trailer?
If you’ve followed these tips:
It takes one person around 15-20 minutes for a standard set-up for a Jayco camper trailer. This includes: levelling, set-up, power lead, and water hose.
If you include bed end flys then it’s more like 25 minutes…
…and maybe another 5-10 minutes if you’re setting up a bag awning too
(which is one of the reasons we replaced ours with a roll out awning which we don’t set up until we need it and takes about 30 seconds)
Read: Fiamma vs Bag Awning for Jayco Camper Trailer: Pros and Cons
You’ll also get lots of different answers to this question because everyone has a different opinion of what set-up means…
…for example, we don’t set up our tables and chairs until we need them
(we leave ours in our boot and boot tunnel so we don’t even have to get them out as part of our routine set-up)
Summary: Time Saving Tips For Setting Up Your Jayco Camper Trailer
It took a couple of hours the first time we set-up our Jayco Swan because we were doing all the things that make it take longer than needed:
- Pulling things out just to get them out of the way
- Doing steps out of order
- Setting up an awning (without know if we’d even need it)
- Messing with unnecessary ropes and poles, then
- Putting lots of things away in cupboards
These time saving tips are the things that we’ve found to be most helpful when it comes to setting up our Jayco Swan camper trailer…
…it’s made our set-up time so much quicker, easier, and less stressful.
After other tips about making the most out of your Jayco camper trailer?


![How To Fix Door Hinges On Jayco Camper Trailer [Pulled Through Door Trim]](https://abigpeacheyadventure.com.au/wp-content/uploads/2021/09/Hinge-Pulled-Through-Door-Trim-of-Jayco-Swan-Camper-Trailer-440x264.jpg)
![Clothesline Modification for Jayco Camper Trailer [Using Bed Support Poles]](https://abigpeacheyadventure.com.au/wp-content/uploads/2020/04/Jayco-camper-trailer-bed-clothesline-modification-hang-between-the-support-poles-1-440x264.jpg)
![Buying a Jayco Camper Trailer: 23 Things To Look For [Checklist]](https://abigpeacheyadventure.com.au/wp-content/uploads/2021/07/23-Things-To-Look-For-When-Buying-a-Jayco-Camper-Trailer-440x264.png)