
![Jayco Swan Fiamma Awning Installation [Step-By-Step With Pictures]](https://abigpeacheyadventure.com.au/wp-content/uploads/2020/09/Jayco-Swan-Camper-Trailer-Fiamma-Awning-Installation-1280x640.jpg)
Disclosure: When you click on links to various merchants on this site and make a purchase, this can result in this site earning a commission. Affiliate programs and affiliations include, but are not limited to, the eBay Partner Network
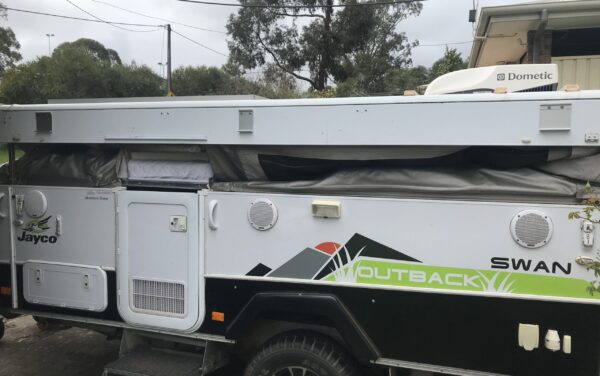
Here I’ll show you step-by-step how I installed a Fiamma 45s awning on our Jayco Swan camper trailer.
Replacing the bag awning is one of the 35 Most Popular Jayco Camper Trailer Modifications…
…and it’s a surprisingly easy DIY job to do
(buying online and spending a couple of hours to install it saved around $500)
Let’s get started:
1. Buy a Fiamma awning from eBay
If you’ve already got one, skip this bit and go to Step 2.
But if you haven’t?
I followed everyone’s advice and bought mine from RV Parts Express via eBay:
I’m very happy with it!
[Here’s its eBay link… the seller I bought it from has 99.8% positive feedback]
NOTE: Everyone seems to recommend the 3.5 m length for a Swan, Flamingo or Penguin… for other models we’ve put together an article
Read: What Size Fiamma Awning for My Jayco Camper Trailer?
2. Make sure you have everything you need to do your Fiamma awning installation
The Fiamma F45s comes with everything you need to install it…
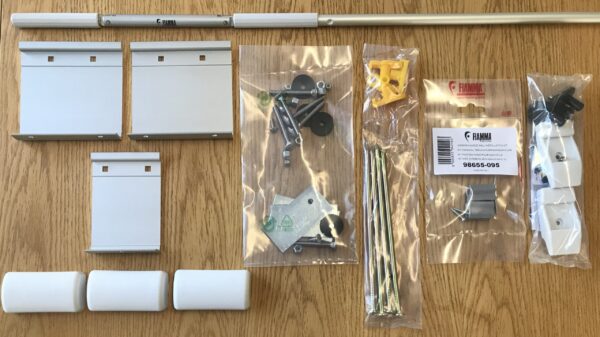
…however there’s a few extra things that I’d recommend you get before you start.
My shopping list was:
- M6 30mm cup head bolts. The bracket bolts that came with the awning were 50 mm long and would’ve needed to be cut down… but 6 of these came to a grand total of $1.86 from Bunnings
- Rain guard. After installation, there’ll be a small gap between the awning and the roof of the caravan… perfect for the rain to trickle down. This is shaped to perfectly fill this gap.
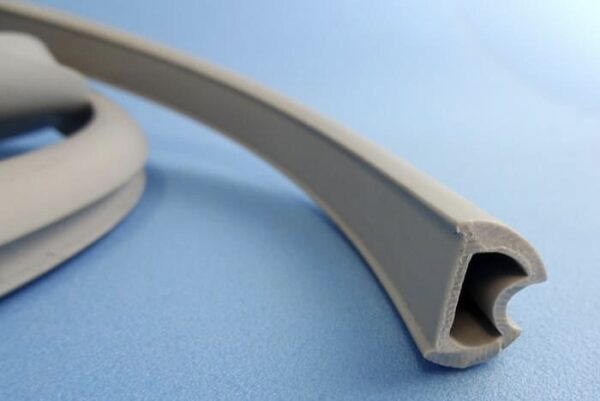
Rain guard: Best place I could find to buy it was here from Fineline Fabrications from their eBay store
3. Tools used for my Fiamma awning installation
This is everything I needed:
- Tape measure
- Cordless drill (5mm and 6.5mm bits)
- Socket set (8mm and 10mm)
- Philips head screwdriver
I also used a pencil and a bit of black tape…
4. Mark the distance between the awning brackets
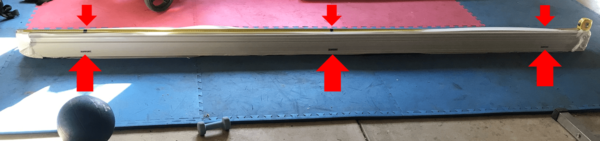
The back of the awning comes marked with the how the brackets need to be spaced:
So I laid my tape measure on top of the awning and marked it with a few tabs of black tape.
Then, I held the measuring tape up against the roof…
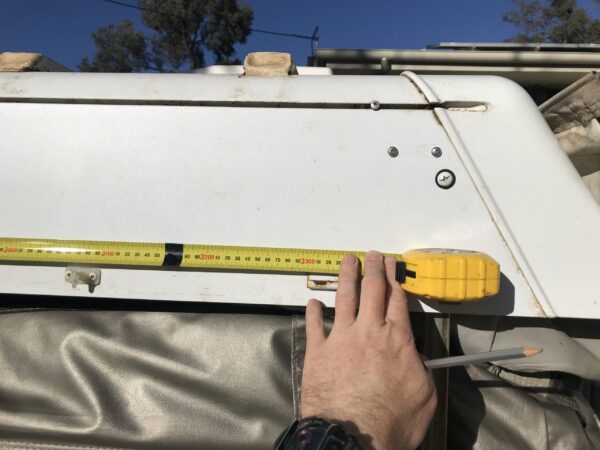
…and marked with a pencil where the brackets needed to be located.
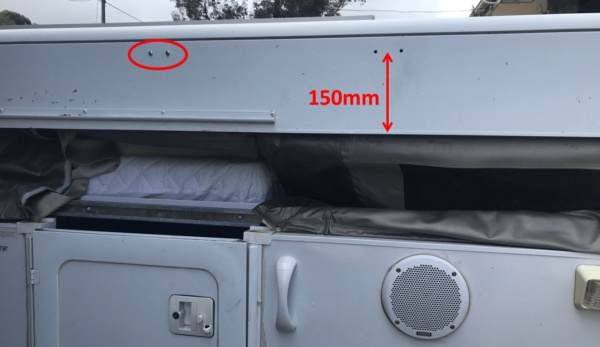
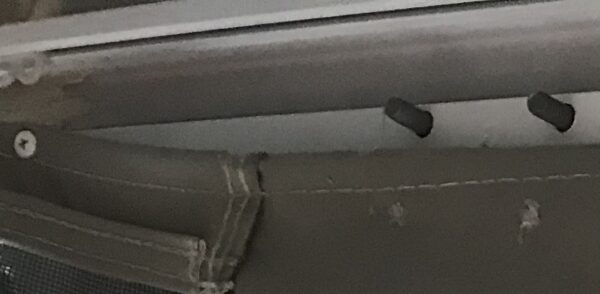
5. Measure, mark and drill the holes at the correct height for the awning brackets
Here’s the part that requires close attention:
If the holes are too low then the roof clips that are on the outside will be in the way…
… too high and the curtain rail that’s on the inside will be in the way.
It’s pretty simple to work out where the holes need to go though:
- The distance from the bottom of the bracket to the holes is 100mm
- Add this 100mm to the top of the roof clips (45mm in my case)
- Check this total measurement inside to see where the holes will come out
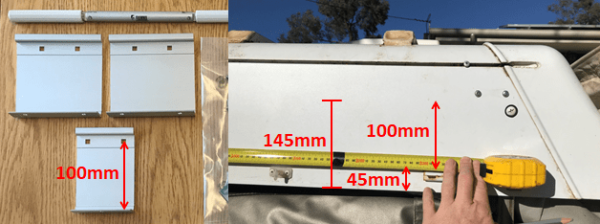
In my case this was a total of 145 mm and was just a smidge below the line of screws that held the canvas to the roof…
….so it seemed the best option for me was to go up a few millimetres and actually go through the canvas to add to the screws that hold the canvas to the roof
[ironically the same height as the existing screw holes from the factory installed bag awning… would’ve been handy if they were in the right position!]
6. Bolt the mounting brackets onto the roof
The rubber washers go between the bracket and the wall…
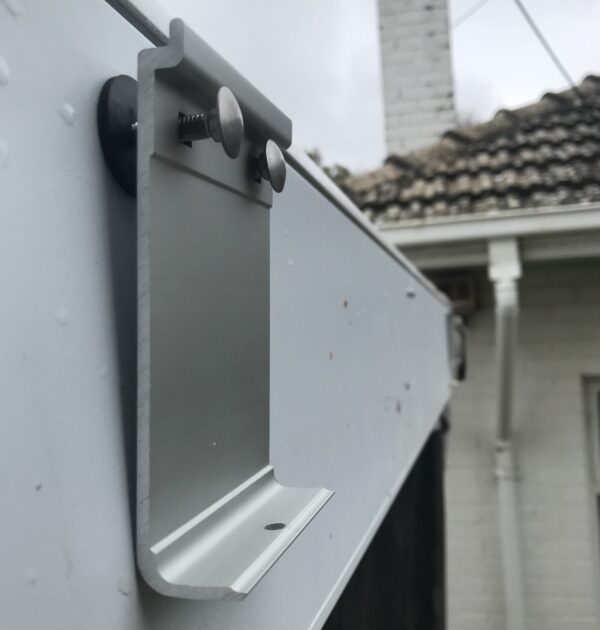
…and the mounting bracket backingplate goes inside:
Different Jayco camper trailers have different set-ups inside the roof. Here you can see I’ve matched the screws that hold up the canvas.
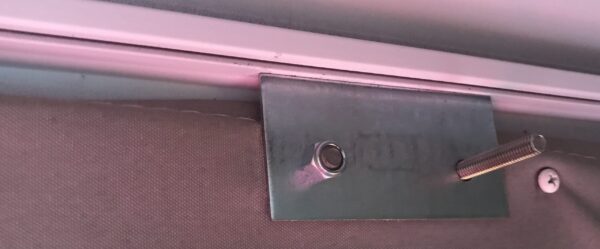
[I took a photo with one of the original bolts to show the difference]
HINT: If you’ve already got your Fiamma rain guard and you’re going to install it today then don’t tighten the bolts just yet
Here’s how it’s looking so far:
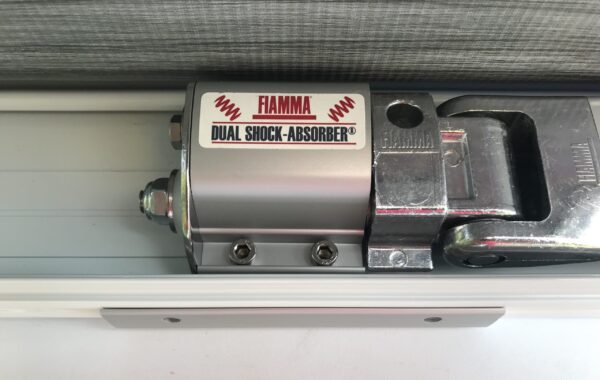
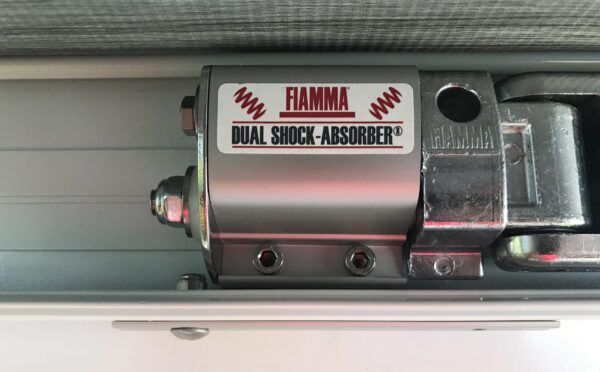
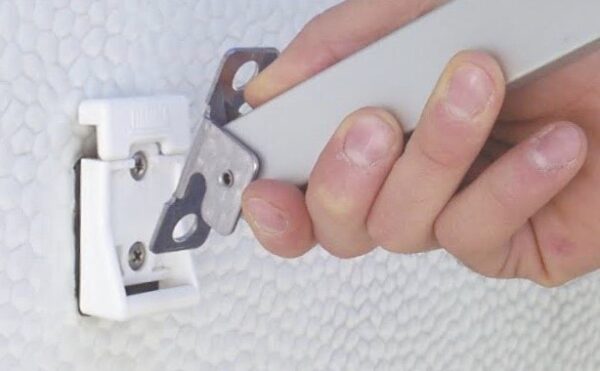
7. Lift the awning onto the mounting brackets
So you can visualise how it fits together:
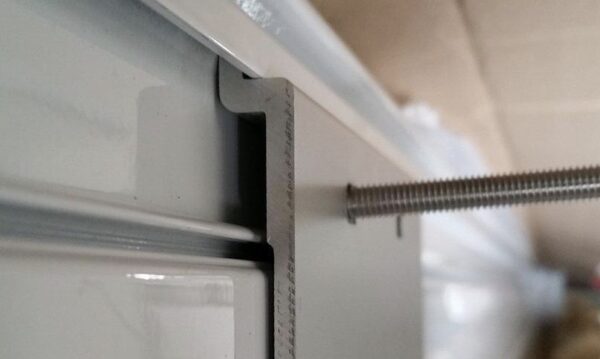
So the next step in the Fiamma awning installation is to just lift it on, and the lip of the bracket sits in the extruded groove.
This part is a 2 person lift…
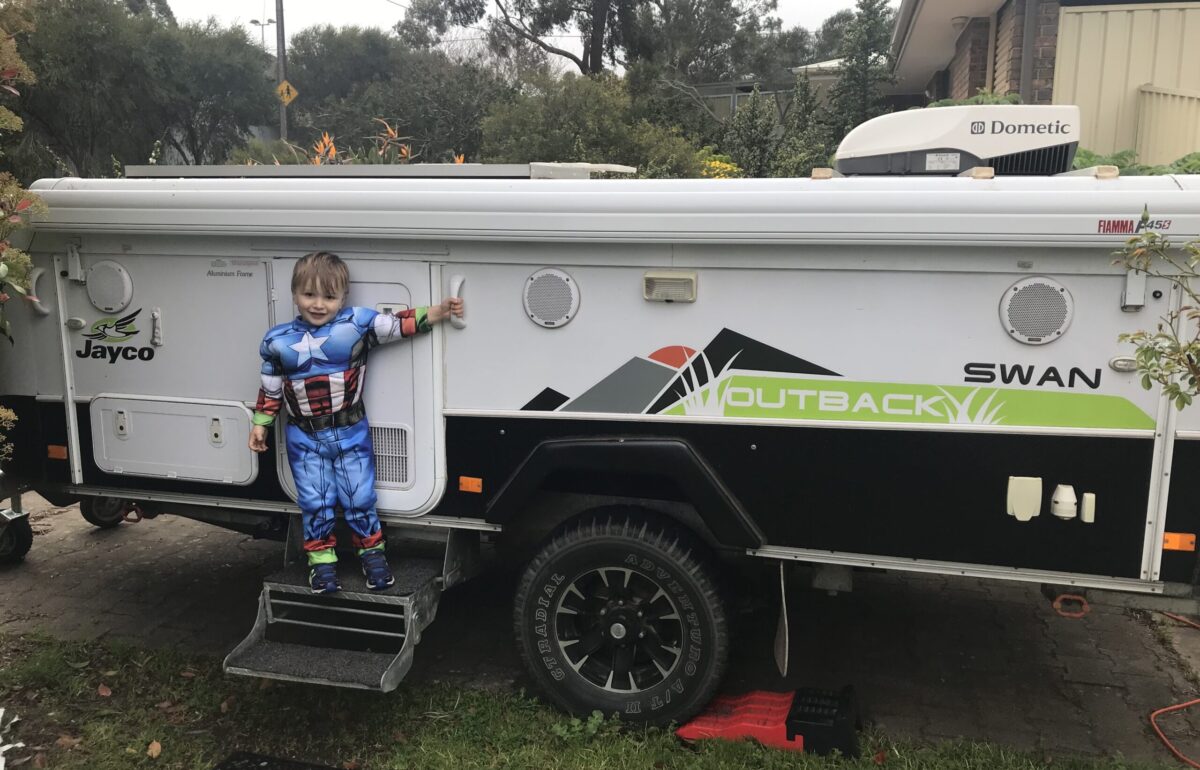
…Captain America approves!
8. Open the awning slightly and bolt the awning to the brackets from underneath
Using the winder handle, open the awning slightly.
Here you’ll see that the bottom of the bracket has 2 holes:
The installation only calls for 1 bolt per mounting bracket… so you get to choose which hole is most convenient
(in this example I used the hole on the left)
Drill, 5 mm drillbit, Phillips head screwdriver, 8 mm socket… done.
9. Seal between the awning and the roof
When you install a Fiamma awning on your Jayco camper trailer, the brackets will create a small gap between the back of the awning and the roof
[perfect for letting rain drip down in the gap.]
Some people run a bead of silicon to close the gap, but my preference was to go for the stuff that’s specifically designed for this:
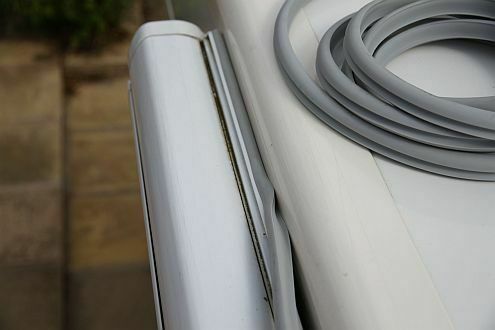
After shopping around it looked like the best place to buy this from was here from Fineline Fabrications via their eBay store
[you can wedge it in after installation, but it’s a easier if you loosen the bolts slightly]
10. [OPTIONAL] Install wall mounting brackets
The Fiamma F45s awning comes with wall mounting brackets.
These allow you to attach the legs to the side of your vehicle instead of having them go straight down to the ground:

This is a stock photo because I opted not to install these on our Swan
[I figured these would be great on a caravan or whizbang, but on a Jayco camper trailer I didn’t want to risk of sideways force bending the lifter arms]
Maybe I’m being overly cautious because it looks like it’s a mixed bag of how people approach this:
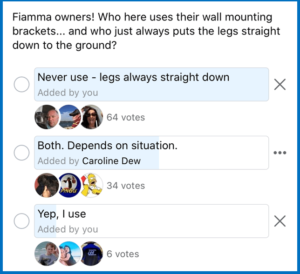
Your call.
11. Make sure you have a way to even out the tension on the other side
Now that you have a fully installed Fiamma F45s awning on your Jayco camper trailer (yay!) when it’s up it can put sideways force on your roof.
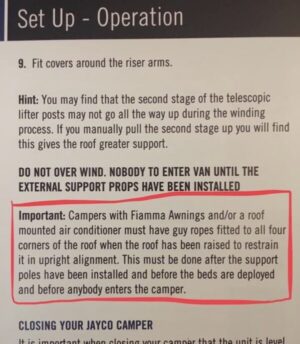
This can:
- Put a bending force on the lifting arms
- Stop the door frame from being in alignment
One option is to replace the lifting arm bolts on the other side with M6 Eye Bolts (from Bunnings) to create a spot to connect guy ropes…
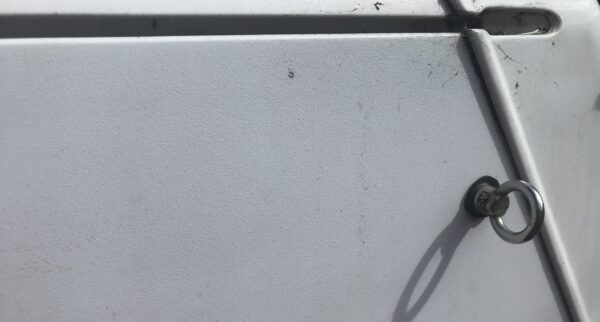
…but another option is a kitchen awning privacy sunscreen:
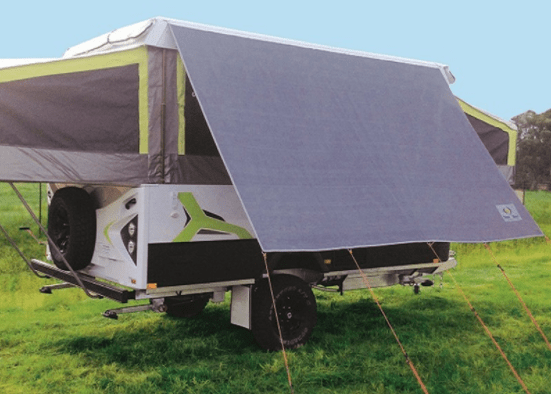
[get them here from eBay… perfect for keeping the sun off the fridge in summer]
Summary: Jayco Swan camper trailer Fiamma F45s installation
Buying online and doing a DIY installation isn’t hard and saves a few hundred dollars.
Am I glad I swapped out our bag awning for a Fiamma?
Absolutely. I can see why it’s pretty high on the list of the 35 Most Popular Jayco Camper Trailer Modifications.
(I did a lot of research for our article The Best Roll Out Awning for Jayco Camper Trailers [3 Options], and it led me to this one).
If you want to get one to do it yourself, then I’d recommend RV Parts Express via eBay.
![Turn Button Supports for Ceiling of Jayco Camper Trailer [Jayco Swan Installation]](https://abigpeacheyadventure.com.au/wp-content/uploads/2020/11/Turn-Button-Supports-for-Ceiling-of-Jayco-Swan-Camper-Trailer-440x264.jpg)
Love your site folks,just bought a Jayco Penguin and your posts are beyond handy,Cheers
Thanks Nev!
Thanks for these detailed instructions. I purchased a Fiamma F45s for my 2015 Dove Outback today and no doubt you have saved me time and worry before the install. Much appreciated!
Hi there – thanks for all the incredibly helpful articles on your site, much appreciated.
I am considering replacing our bag awning with the Fiamma – for ease of setup. However, we have full annexe walls that connect to the bag awning so we would lose this functionality, or have to buy an expensive privacy room for the Fiamma. We don’t use the annexe often, only when staying for long durations with the kids, where it can be a real asset.
So my question is – once the brackets are installed for the Fiamma, can these remain in place whilst the bag awning is switched back onto the van (Jayco Swan Touring) on those occasions we might want to revert to that awning and the annexe ? Or would everything have to be removed to reinstall the bag awning, which makes it a tedious option…?
Thanks !
Hi Ian, no you wouldn’t need to remove the brackets… some people have both, exactly like you’re thinking
Awesome work !!! Purchased a Fiamma online on Tuesday and it arrived on Wednesday!! Now that the weather has stop this stupidity I will be giving it a crack tomorrow with the help of your instructions! Can’t wait for adventures ahead with this new awning
Cheers
Great instructions and easy to understand, well done ! Gave it a crack in the weekend, took about 4 hours all up but we wanted to make sure we measured twice, drilled once.
Do you have any step by step instructions for the anti flap kits ? The booklet that came with it is a bit vague, especially where and how you connect it to the Awning / Camper side. I cant seem to find anything on youtube. The kit came with various parts and not sure the right ones to use 🙁
Hi Scott, thanks mate! No, but I’ll add that to the list to put some together 🙂
Hey Dude.
I ordered an F45 for the Hawk, went with the 350. Just stopping in here as a refresher on how to install.
Hopefully it arrives the week and I can get it installed in time for Easter camping.
Got it at RV Parts Express with a 10% discount code too,
Happy camping.
i just had my dove repaired (rear cables for winder). I mentioned the fiamma awning but he said it’s too heavy. My van is a 2004 so i’m guessing maybe because it’s older
Hi Carla, my guess would be that it’s the weight in conjunction with other accessories that’s on the roof (it’s about total lifting capacity)
If replacing the M6 bolts on the privacy screen side with eye bolts, is there any kind of weather sealing required or is it just straight unscrewing one bolt and screwing in the other type?
Hi Matt, it’s a straight swap luckily