Disclosure: When you click on links to various merchants on this site and make a purchase, this can result in this site earning a commission. Affiliate programs and affiliations include, but are not limited to, the eBay Partner Network
There’s 4 caravan levelling devices you need to level your van on uneven ground (or on a slope)…
…and 2 more if you want to keep it level on soft ground
In this article we’ll show you:
- The caravan levelling devices everyone needs
- How to level a caravan by yourself
- The easiest way to install a spirit level
Let’s get started:
Caravan levelling devices you need to level your van:
Unless you want doors swinging open and water getting stuck in your sink… then these should make your list of caravan ‘must haves’:
1. Levelling ramps: get your van level on uneven ground (side-to-side)
Levelling ramps should be in your list of caravan must-haves.
[They’re one of the 33 Most Popular Caravan Accessories]
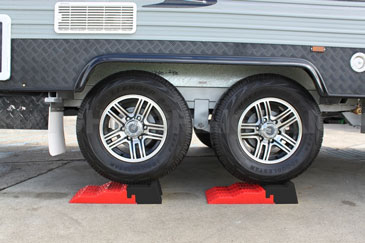
HINT #1: Make sure you place them DOWNHILL so they help stop your van rolling away
HINT #2: Make sure you get levelling ramps that come with wheel chocks
[you’ll need them too]
Oh and also:
HINT #3: Don’t make the same mistake I did…
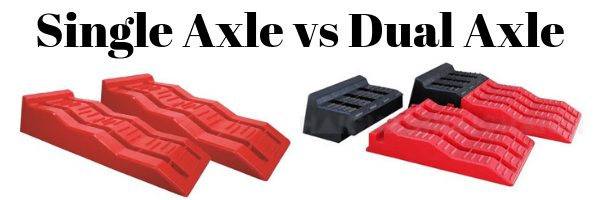
…there’s a difference between levelling ramps for a single-axle caravan and levelling ramps for a dual-axle caravan
Levelling ramps: Make sure you get ones with wheel chocks. The best place for a single-axle caravans is TRA Australia (100% positive feedback), and for a dual-axle caravan check AutoBox (4.5 stars)
2. Spirit level or electronic levelling device: how to tell your caravan is level
You need a levelling device to know how many steps to drive up the levelling ramps
Got a travelling partner and some handheld UHFs?
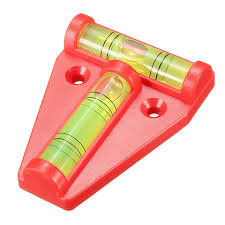
The cheapest levelling device is a mini spirit level you stick to your drawbar (less than $5 here on eBay)
But if you want a better way?
Electronic levelling devices are the way to go:
- Safer than having your partner walk next to the drawbar when you’re driving around a free-camp looking for a flat spot
- No need for a handheld UHF (or shouting)
- Travel alone or you’re a solo parent? Much easier.
- Maybe you just like gadgets!
The 2 best caravan levelling devices are:
1. EzyLevel Caravan Level Indicator
You stick a transmitter in your van:
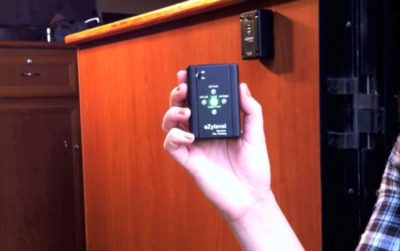
Then you have a receiver that beeps and lights up when you’re level
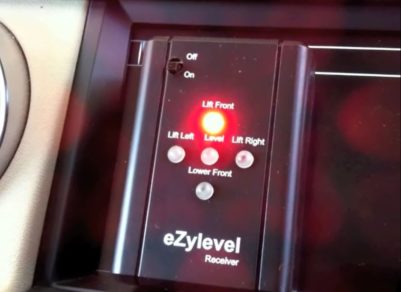
That’s pretty… Ezy!
2. SavvyLevel Precision Caravan Levelling System
This one is described as:
“a marriage saver when levelling at the end of a long day”!
Like the EzyLevel you stick a transmitter in your van…
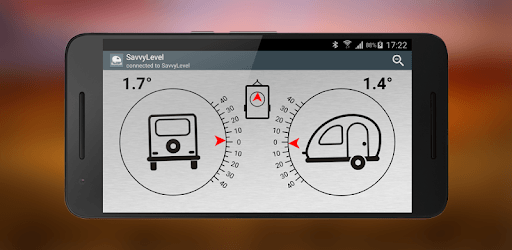
…but there’s a free app for your phone or tablet to tell you when you’re level
Caravan levelling devices: Best places to buy are here on eBay for the T-Spirit Levels, then here for the SavvyLevel Precision Caravan Levelling System
3. Wheel chocks: keep your caravan level (and you safe)
Once you’ve levelled your van side-to-side the next step is to put in wheel chocks
In fact:
Even if you didn’t bother with levelling ramps…
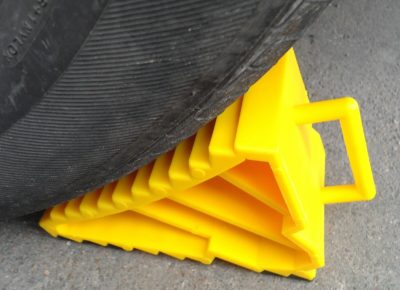
…you should still put wheel chocks in place.
Every time.
Because even when you’re on ground that SEEMS pretty flat there’s still a risk that when you un-hitch:
- Your van can jump forward a few inches and bash into the back of your car, or
- The hitch can swing out to one side and bang your shins (ouch)
Wheel chocks: If they didn’t come with your levelling ramps then get some pretty cheap here from AwardRV (they have 100% feedback)
4. Jockey wheel: get your caravan level on a slope (front-to-back)
Once you’ve got your van level side-to-side AND chocked your wheels then it’s time to un-hitch
[keep the chains on until you’re safely off the tow ball though]
Once you move your car out of the way it’s time to wind your jockey wheel up or down until the van is level
Now, you probably already have a jockey wheel…
…but here’s 2 of the best caravan accessories devices you can get to kill 2 birds with one stone:
1. Trail-A-Mate: The jockey wheel that doubles as a hydraulic jack
These are one of the most popular caravan accessories.
[Don’t take my word for it… go to any caravan park and you’ll find A LOT of happy campers]
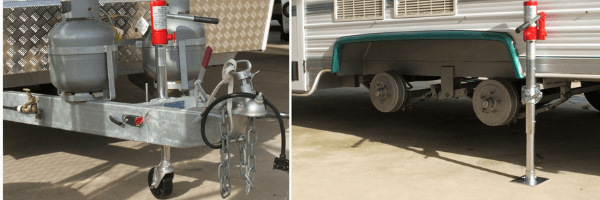
Plus here’s a fun fact:
You need a better jack anyway.
In an interview with a RAA mechanic:
“A really common reason for roadside assistance call outs is that factory-standard jacks don’t give enough clearance”
Trail-A-Mate Caravan Hydraulic Jockey Wheel and Jack: Best place to get is online from OurVanRV Superstore (they’ve sold hundreds and have a 5.0 star rating)
2. Alko Ratchet Power Mover: The jockey wheel that doubles as a caravan mover
This one’s the best caravan mover to get if you don’t want to spend too much
[They’re between $130–$170 on eBay and are rated 4.6 stars]
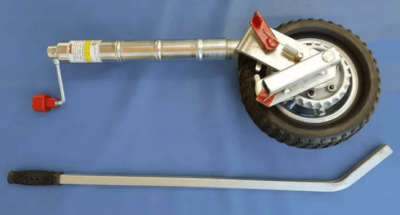
So for about the same size as your standard jockey wheel, you can:
1. Use it as your jockey wheel
2. Reverse your van into those tight spots
3. Make it easier to hitch your caravan up to your car
Alko Power Mover: Best place to get is online from Award RV Superstore (again!)
[If you’ve got a heavier van then check out the Camec Trailer Valet Caravan Mover]
Now:
Wind down those stabilisers and enjoy the flatness you’ve created
But also…
Caravan accessories to keep your van level on soft ground
Once you’ve got your van level you want to keep it that way.
Here’s how:
5. Jockey wheel chock pad: stop your wheel from sinking
It’s all when and good to get your van level…
…too bad if it sinks overnight
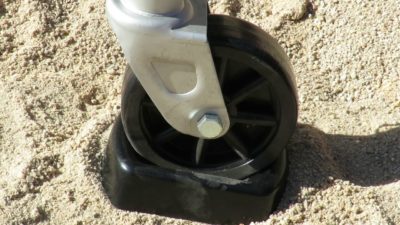
This can make it hard to hitch up the next morning
[not to mention the strain it’ll put on your stabilisers]
They’re like $15 from eBay with free postage here [totally worth it]
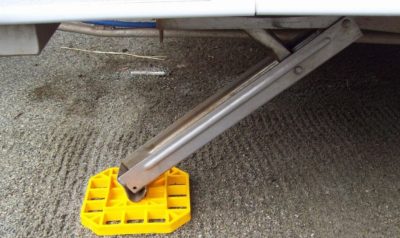
6. Caravan stabiliser pads: stop your van rocking and squeeking
It’s pretty annoying when you get your van nice and level…
…and then within a few hours, the stabilisers sink a bit, and the van starts squeeking
“If the caravan’s a rocking, don’t come a knocking”
Stabiliser plates: Best place to get them is from eBay ($20 – $30 with free postage)
Summary: Caravan Levelling Devices: Items You Need To Level Your Van (And Keep It Level)
To level a caravan on uneven ground (or a slope) you need:
- Levelling ramps to get your van level side-to-side
- A spirit level or electronic levelling device to tell your caravan is level
- Wheel chocks to keep your caravan level (and you safe)
- A jockey wheel to get your caravan level (front-to-back)
- A jockey wheel chock pad to stop your wheel from sinking, and
- Caravan stabiliser pads to stop your van rocking and squeeking
Bonus: Where should I put my spirit level on a caravan?
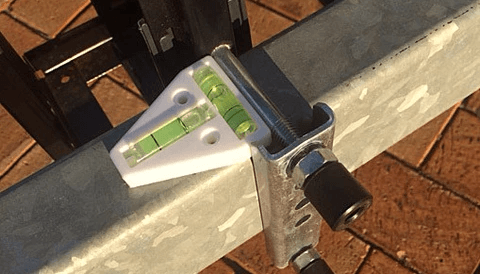
You should put your spirit level on your drawbar so you can see it without needing to go inside
[It makes the whole levelling process A LOT easier]
But first:
You must know that just because your drawbar is level…
…the inside of your van may not be
So here’s what you do:
How to stick your spirit level to your caravan drawbar:
Don’t worry about getting the drawbard level. Instead, get a builder’s spirit level:
- Go INSIDE your caravan and check that it’s level where it’s most important… kitchen bench, sink, etc
- Just for fun: check the level of drawbard (you’ll find it’s probably not level!)
- Put a bit of silicon on your drawbar
- Put the T-Spirit level onto the silicon and line up the bubbles
- Wait until it dries
T-Spirit Level: Click here for the best $5 you’ll ever spend!
That’s why a T-Spirit Level is also one of the 20 Caravan Gadgets Under $20 [That Make Travelling Australia Easier]
Comment below: what’s the worst experience you’ve had from an uneven van?

![Best Caravan Towing Mirrors in Australia [2021 Review]](https://abigpeacheyadventure.com.au/wp-content/uploads/2019/03/Best-Caravan-Towing-Mirrors-Cover-Image-440x264.png)

We have a 14ft Jayco Poptop. When we use a levelling ramp, driving up onto the ramp and chocking behind the ramp, the van tends to shift sideways- what are we doing wrong?
Hi Laurel,
We had the same problem until we started to make sure that the ramp was always downhill; this means that we sometimes drive forward up onto the ramp, sometimes we need to reverse onto it. This helps the van stop moving as much when unhitching. This article here might be of help: How To Level A Caravan On Uneven Ground [Step-By-Step]
Cheers,
Michael and Natalie
I’ve had a soft floor camper for years, and spent a lot of time camping in sandy locations. This means poles, stabilisers, jockey wheels all find a new ‘level’ over night – particularly the poles for the fly/annex. Like the squares listed above for the stabilisers, we used the same type of idea, only we used some left over ply I had laying around. 9mm ply cut into 6 inch squares. Simple cheap solution, but made a world of difference when the kids didn’t wake up complaining the annex had sunk over night, and the rain had pooled and dripped on them.