
![Jayco Camper Dimmable LED Awning Light [Installation and Review]](https://abigpeacheyadventure.com.au/wp-content/uploads/2024/01/Jayco-Camper-Trailer-Dimmable-3-Colour-LED-Awning-Light-1280x640.png)
Disclosure: When you click on links to various merchants on this site and make a purchase, this can result in this site earning a commission. Affiliate programs and affiliations include, but are not limited to, the eBay Partner Network
In this article I’ll show you step-by-step how I installed this dimmable 3-colour outdoor LED awning light on my Jayco Swan Camper Trailer
(it’s one that I got here from 3DPrintRV)
This is an awesome upgrade if you like sitting outside at night without being blinded
(the stock Jayco camper trailer LED awning lights are commonly known as ‘retina burners’!)
It was a pretty simple installation…
…so let’s get started:
1. Get the Dimmable 3-Colour LED Awning Light from 3DPrintRV
If you already have yours skip to Step 2…
…otherwise the best place to get one is direct from Royce here at 3DPrintRV
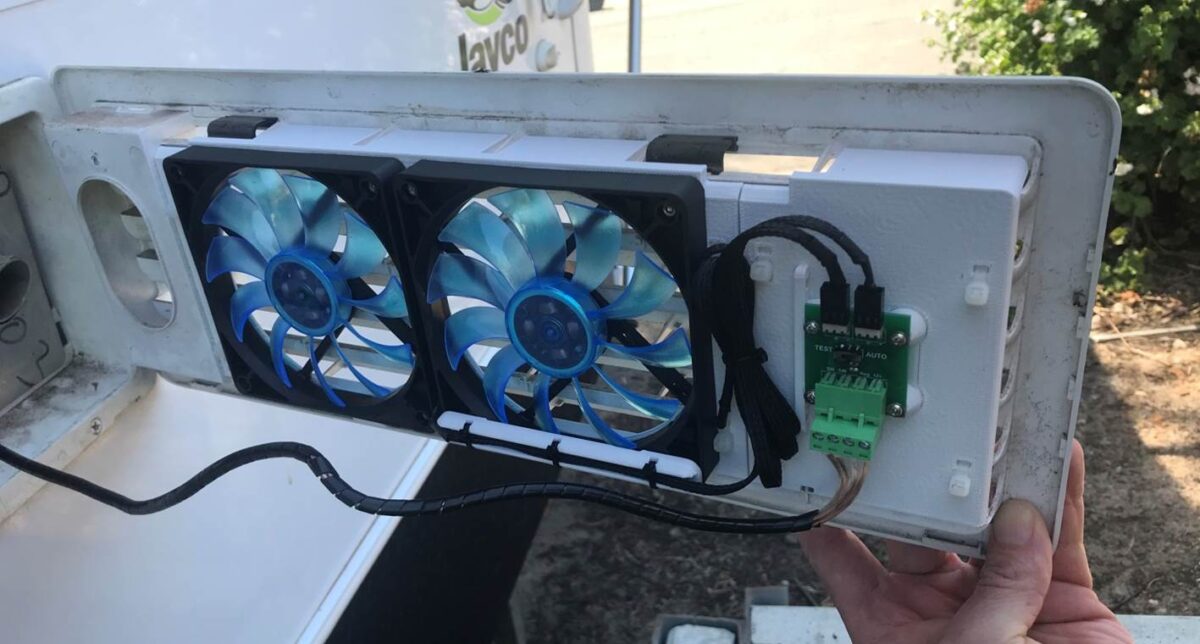
(the same guy the makes these awesome Klevakool fridge fans)
(he’s an absolute legend with great personalied customer service)
These LED awning lights come with an:
- Adaptor plate
- LED lamp kit
- Bolt hole covers, and
- A couple of screws
They also come with some pretty well-written instructions…

…sort of removing the need for this article, tbh!
2. Gather up everything you need for installation
There are a number of things I needed for this installation.
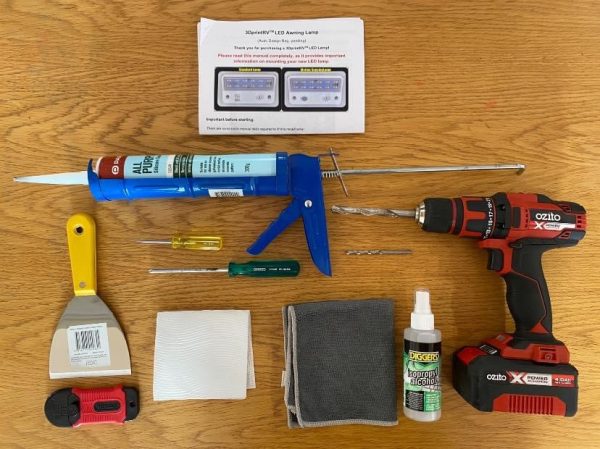
These were:
- Small flat-blade screwdriver
- No. 2 Philips head screwdriver
- Scraping knife
- Paint scraper
- Drill
- Drill bit – 10mm drill
- Drill bit – small (for pilot hole)
- Isopropyl alcohol
- Some cleaning cloths, and
- Neutral cure silicone (with caulking gun)
(a trip to the big green shed was needed!)
3. Check the camper is disconnected from 240V and isolate the battery
Disconnecting from 240V is pretty simple
(you just unplug the extension lead)
And to isolate the battery you might need to disconnect it
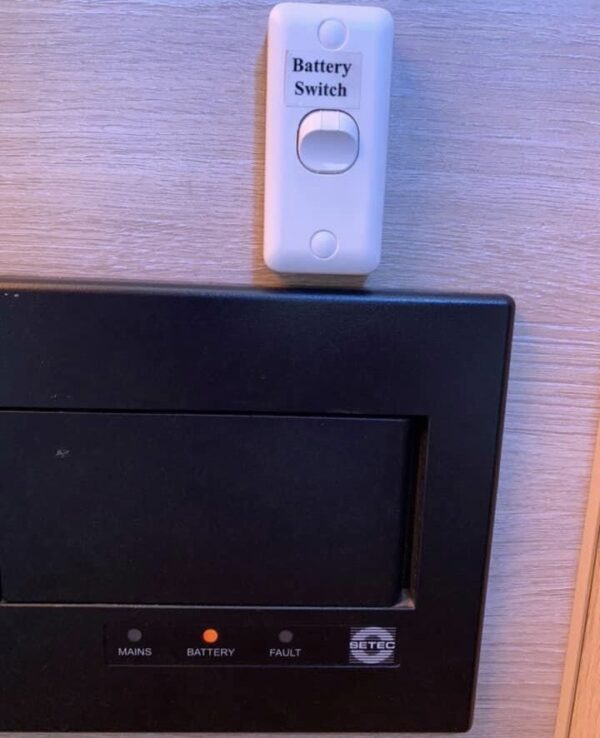
(in our Jayco Swan it was just a case of flicking the Battery Isolation Switch)
4. Use a screwdriver to pop the lense cover off the old light fitting
Once you’ve done this using the small flat-blade screwdriver, keep the lense cover handy…

…it’s useful to keep the screws from getting lost!
5. Disconnect the 2 wire terminals
Use the small flat-blade screwdriver for this too
(and then pop them in the lense cover for later)
6. Undo the 4 screws holding the light to the camper
Use the Philips head screwdriver and then put the screws in the lense cover for later
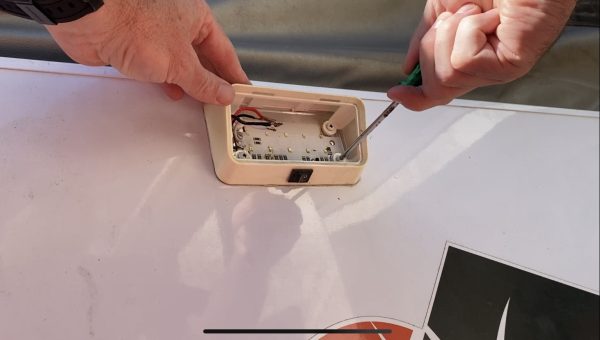
(you’ll need to keep these to mount the new light’s adapter plate)
7. Remove the old light by cutting the sealant-adhesive with a scraping knife and (carefully) prying it off with a paint scraper
For this I used a flat blade scraping knife to break the seal…
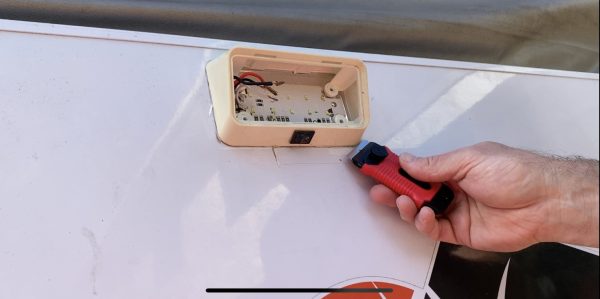
…and then a sharp paint scraper to cut through the rest of the sealant
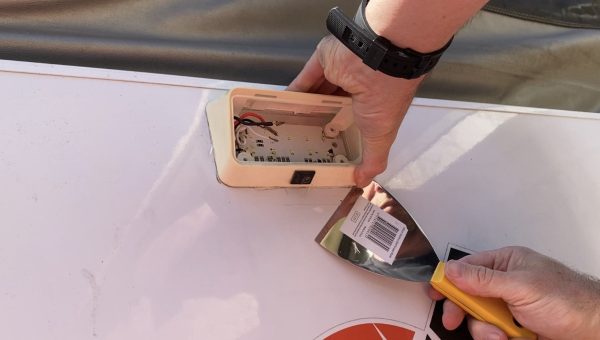
An important point:
Take extra care when you’re cutting through the sealant when you’re near the wires so the you don’t cut through them too
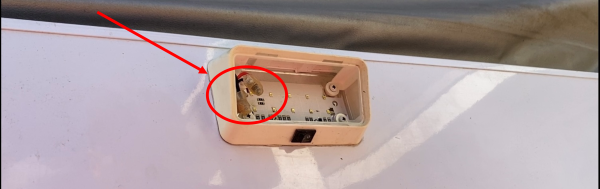
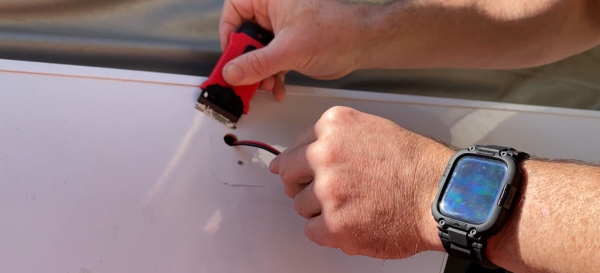
8. Use a drill to carefully widen the outlet for the wires
This is so that the terminal connectors can be pushed inside the wall cavity of the camper
(unlike the stock light, there isn’t the space between the new adaptor plate and LED awning light)
To do this I started off by carefully drilling a pilot hole with a 4 mm drillbit
(this is one of the few cases where size doesn’t matter)
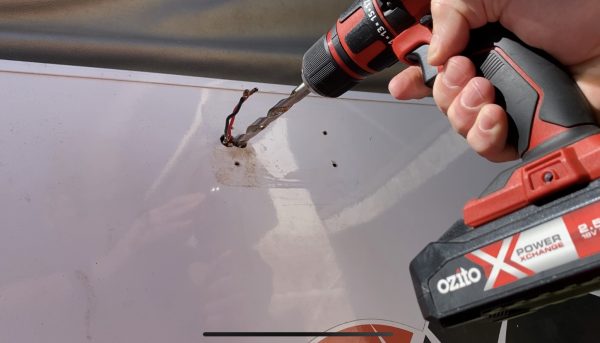
And then I used the 10 mm drillbit to drill out a hole big enough for the terminal connectors to fit through
9. Clean the surface with the scraping knife and some isopropyl alcohol
I’ll be honest here:
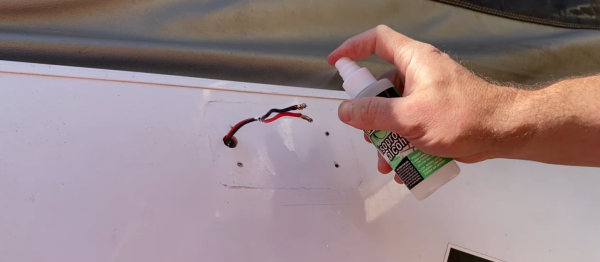
I initially used the alcohol and wiped it down before I did the drilling part
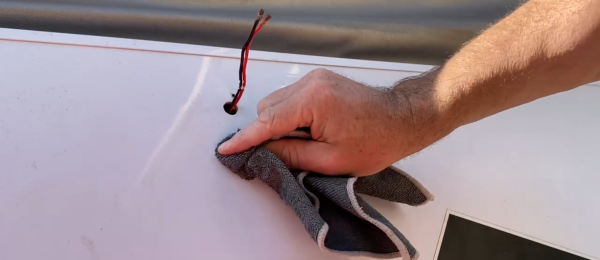
(which meant I had to go back and wipe it all down a second time!)
10. Thread the wires of the new LED awning light through the adaptor plate and reconnect them
Red-to-red and black-to-black…
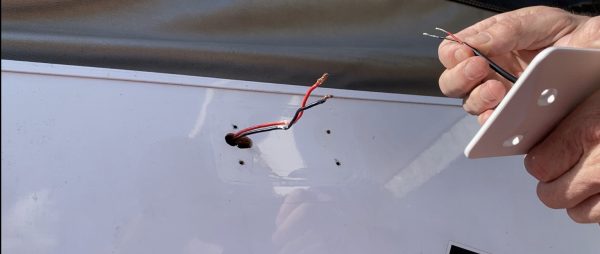
…using the same wire terminal connectors and flat-blade screwdriver
11. Test to make sure the new LED awning light works
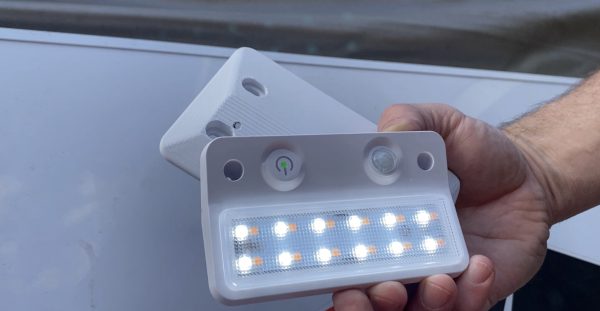
It’s pretty cool to see the light easily cycle from white to orange to warm-white!
12. Apply some neutral cure silicon to seal around the mounting holes and wire channel
So after I’d pushed the connectors into the cavity of the camper…
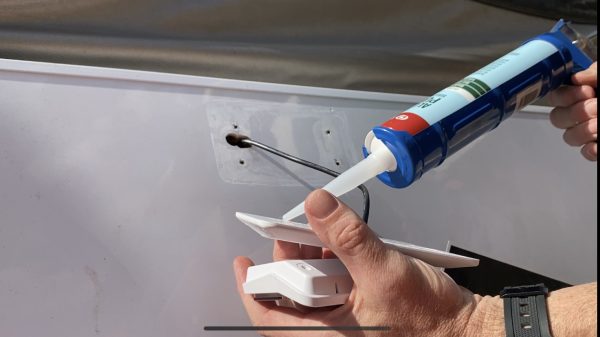
…now it’s time to create a nice seal so no water can get inside either the light or the body of the camper
13. Screw on the adaptor plate using the existing screws
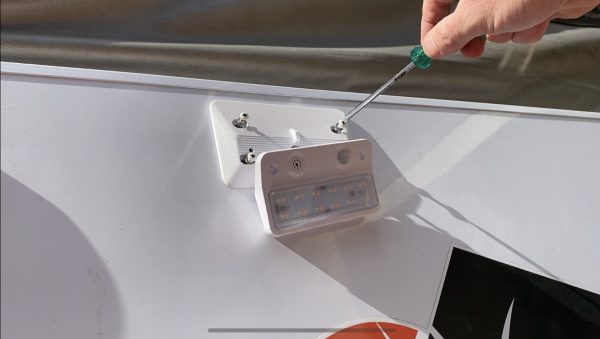
(and the supplied washers)
14. Press the bolt hole covers into place
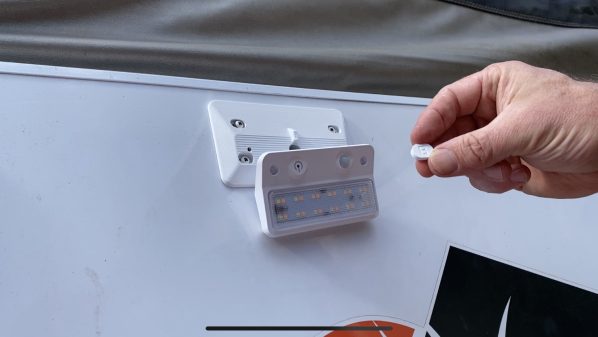
These go in nice and snug to create a tight seal and prevent water getting in through the screw holes
15. Add another dob of silicon around the cable entry
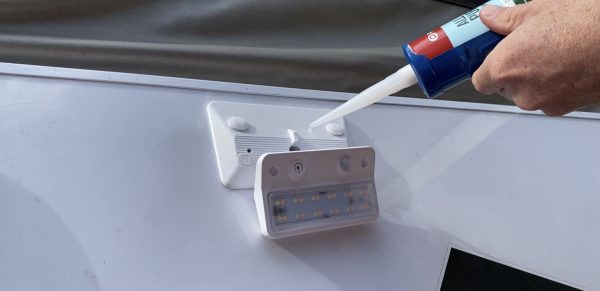
This creates a nice seal between the light and the base plate adapter
16. Screw the light to the adaptor plate
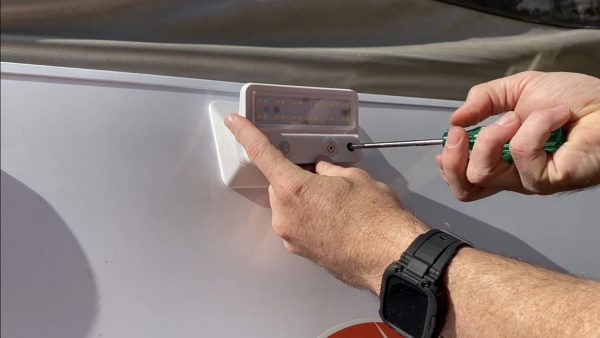
This is done using the two screws that were supplied with the unit
17. Mess around with the different colours and brightness levels!
It’s quite easy to use:
- A short press of the button cycles through the different colours (white, orange, warm-white)
- A long press of the button switches between 3 different levels of brightness
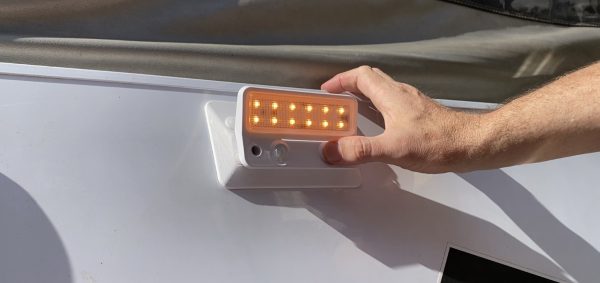
A huge improvement than the standard ‘retina burner’!

A few other points I quite liked about this light:
- The lights are angled downwards so that (even when they’re at their brightest setting) they aren’t blinding you
- You can turn it off and on at either the usual light switch or at the light itself
- If you turn it off at the light switch it saves the last setting
Summary: Installing the Klevakool Triple Colour LED Awning Light from 3DPrintRV
Installing the Klevakool triple colour LED awning light was a pretty simple process…
…and they are pretty cheap from 3DPrintRV.
If you like to spend a lot of time outside then they are totally worth it:
Having the orange light option to reduce bugs is a win, and being adjustable it means that you won’t get blinded
If you’d like to get one then the best place is straight from 3DPrintRV here
UPDATE: Since I’ve written this, these have become a pretty popular addition to people’s Jayco campers… so I’ll be adding this to this article: 35 Most Popular Jayco Camper Trailer Modifications
![Jayco Swan Fiamma Awning Installation [Step-By-Step With Pictures]](https://abigpeacheyadventure.com.au/wp-content/uploads/2020/09/Jayco-Swan-Camper-Trailer-Fiamma-Awning-Installation-440x264.jpg)
![Fridge Fan Mod Kit Installation: Jayco Swan [Step-By-Step With Pictures]](https://abigpeacheyadventure.com.au/wp-content/uploads/2020/11/Klevakool-Fridge-Fan-Mod-Kit-Jayco-Swan-Camper-Trailer-Installation-Step-By-Step-With-Pictures-440x264.jpg)
![Turn Button Supports for Ceiling of Jayco Camper Trailer [Jayco Swan Installation]](https://abigpeacheyadventure.com.au/wp-content/uploads/2020/11/Turn-Button-Supports-for-Ceiling-of-Jayco-Swan-Camper-Trailer-440x264.jpg)